This easy and intuitive method is perfect for making a strong and bubbly sourdough starter from scratch. In just a couple of weeks, you’ll have your very own starter ready to use. Learn how to make the strong & bubbly starter you’ll need to bake delicious sourdough breads, bagels, donuts, and more!
Some links in this post may be affiliate links. Read my disclosure policy.
I want to demystify the process and arm you with all the information you need to confidently dive in and make your own starter. You’ll understand how it works, and why your starter might behave in strange ways during certain phases of the process. With some patience and perseverance, you’ll have a beautiful bubbly starter in just a few weeks or less!
Jump To:
- Prefer to Watch?
- What is sourdough starter?
- Why bother making sourdough?
- Why this method works
- What you’ll need to make Sourdough Starter
- Temperature and sourdough starter
- Step-by-step instructions to make a sourdough starter from scratch
- Phase 1: Establish Your Sourdough Starter
- Phase 2: Build your Sourdough Starter
- Phase 3: Strengthen your Sourdough Starter
- Is your sourdough starter ready to bake with?
- Beginner Sourdough Starter Recipe
Prefer to Watch?
What is sourdough starter?
Sourdough starter is a living symbiotic culture of wild yeasts and bacteria that feed on the carbohydrates in flour. They produce the carbon dioxide necessary to leaven (or rise) a loaf of sourdough bread. Before commercial yeast was invented, sourdough was the only way leavened bread could be made.
Why bother making sourdough?
Yeast is usually very easy to buy at any grocery store, while making and feeding a sourdough starter takes some work and commitment. So why do so many bakers make the extra effort to make and maintain a sourdough starter?

Sourdough bread has a delicious complexity of flavour and texture that you can’t really replicate using store-bought yeast. It adds an extra-satisfying layer of accomplishment to bread baking when you use wild yeasts you cultivated yourself like a freaking wizard! And while the science is still out on the health benefits, there is some evidence that sourdough bread is easier to digest and has a lower glycemic index than breads made with store-bought yeast.
Because the sourdough culture partially breaks down the gluten in flour, many people with gluten-sensitivity are able to eat sourdough breads without issue. The bread will still contain plenty of gluten after fermentation though, so please note that this won’t work for anyone with Celiac disease or severe gluten sensitivity. It is possible to make a gluten-free sourdough starter, but that is beyond the scope of this tutorial. Anyway, as a bonus, sourdough bread tends to last longer before drying out or going moldy (in those rare cases when you and your family don’t gobble it up the first day). Bread that is not only more delicious but also likely better for you than regular bread? Count me in!

Why this method works
Most recipes and tutorials out there will have you follow a strict and arbitrary feeding schedule, and claim that your starter will be ready after only 7 days. For many bakers that is simply not true! When you feed a fledgling starter before it’s ready by following an arbitrary feeding schedule, you’re diluting and weakening the new culture of wild yeasts that’s trying to get established. Most sourdough starter tutorials have you feed it this way on Day 1, then another way on Day 2, and waiting a specific amount of time between feedings. The problem is, following a day-by-day tutorial to make a starter doesn’t take into account the variations in room temperature and other factors that affect how quickly a sourdough culture gets established. It’s far better to be patient and let your starter show you when it’s ready to be fed or to move on to the next phase. This way you’re reacting to your specific starter, feeding it whenever it’s at its most active, and actually making it stronger with each feeding.
What you’ll need to make Sourdough Starter
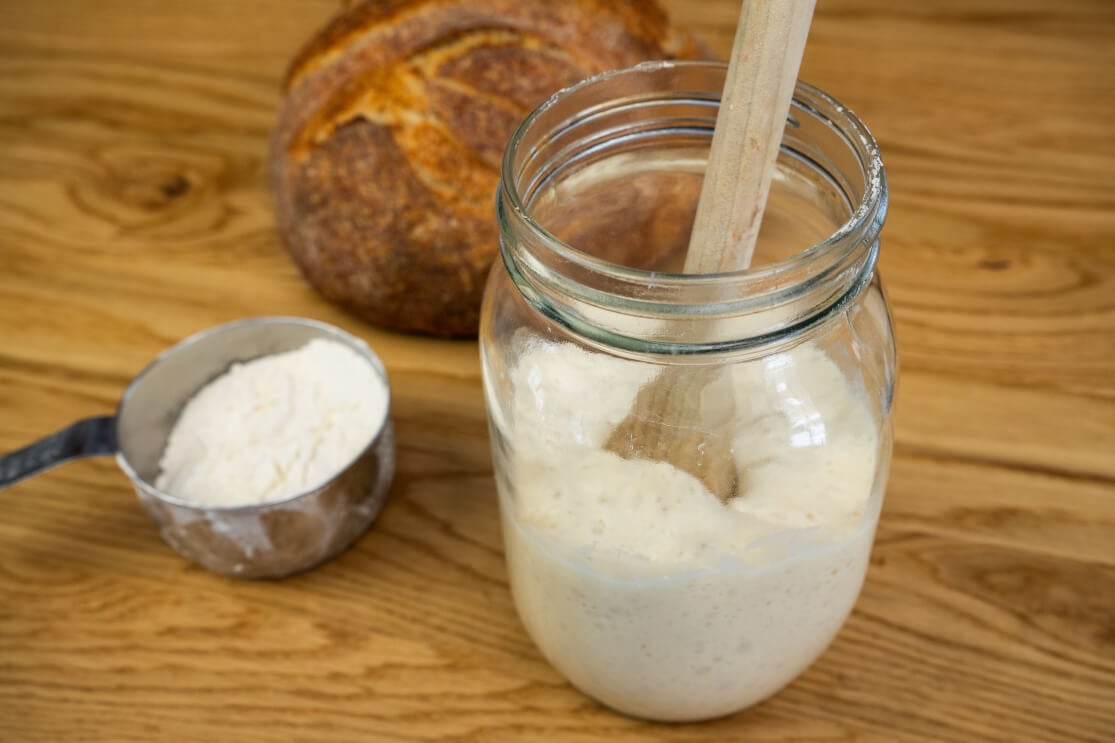
Flour
Rye or whole wheat flour is ideal to get the starter off to the best possible start. You don’t need to get both flours—one or the other will work just fine. There’s no need to spend extra for organic unless using organic is important to you. You could use all-purpose or bread flour to make your starter. But wild yeasts and sourdough bacteria really thrive on all the minerals and nutrients in rye and whole wheat flours. So using one these types of flours will set you up for success. Once you have an established starter, giving it a feed with rye or whole wheat is also a great way to give it a boost if it’s ever sluggish.
All-purpose (AP) or bread flour is used later on in the process as it’s usually less expensive than rye or whole wheat and easier to find. Feeding the starter with AP or bread flour also makes a starter with milder flavours that’s suitable for a wide range of recipes. Either flour will work great—use whatever is most convenient for you. And again, splashing out on organic is not necessary unless you want to. I would recommend avoiding bleached flour as it could hamper your starter’s progress. That said, some bakers do use bleached flour without issue so if that’s all you can find don’t let that stop you from attempting sourdough.
Water
Water is the only liquid in the starter. You don’t need to be too fussy about what kind of water you use. Generally speaking, if it’s safe to drink it’s fine to use for starter. For the best chance of success though, you want to use either filtered water or dechlorinated tap water. A lot of treated tap water contains chlorine which can slow down your starter’s progress. To dechlorinate your tap water you can either boil it uncovered for 15-20 minutes and then let it come back to room temperature. Or you could leave it out uncovered at room temperature for 24 hours to evaporate the chlorine out. The only kind of water you really should avoid using is distilled, which lacks the mineral content that a sourdough starter needs to thrive.
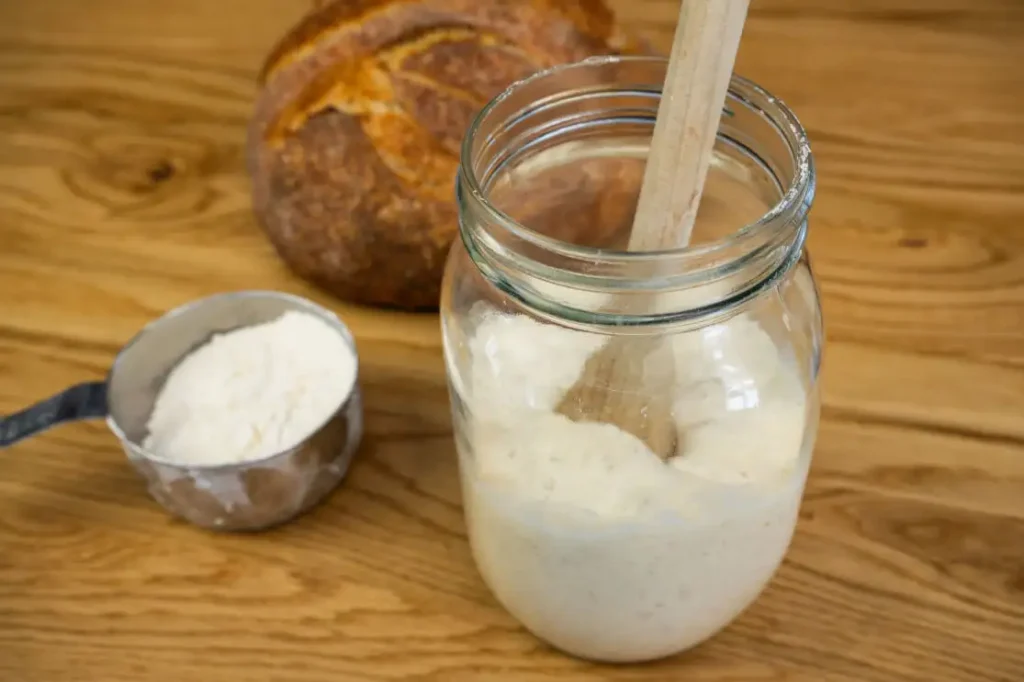
Jars
Using to jars makes it easy to weigh out the amount of starter you’ll feed at each stage. The best jars for sourdough are transparent, so you can easily see what’s going on inside. Choose a jar with a wide mouth and little to no shoulder, so it’s easy to stir your starter and scrape the sides down. Wide-mouth mason jars (12-16 oz. in size), Weck tulip jars (500-750 ml in size) or clear food-safe plastic jars are all great choices. You could even save a couple of glass pasta sauce jars and use those. If you only have one jar, you can make a note of its empty weight without a lid. Then remove enough starter from the jar before so the total weight equals the weight of the jar plus the weight of the starter you need for your feeding.
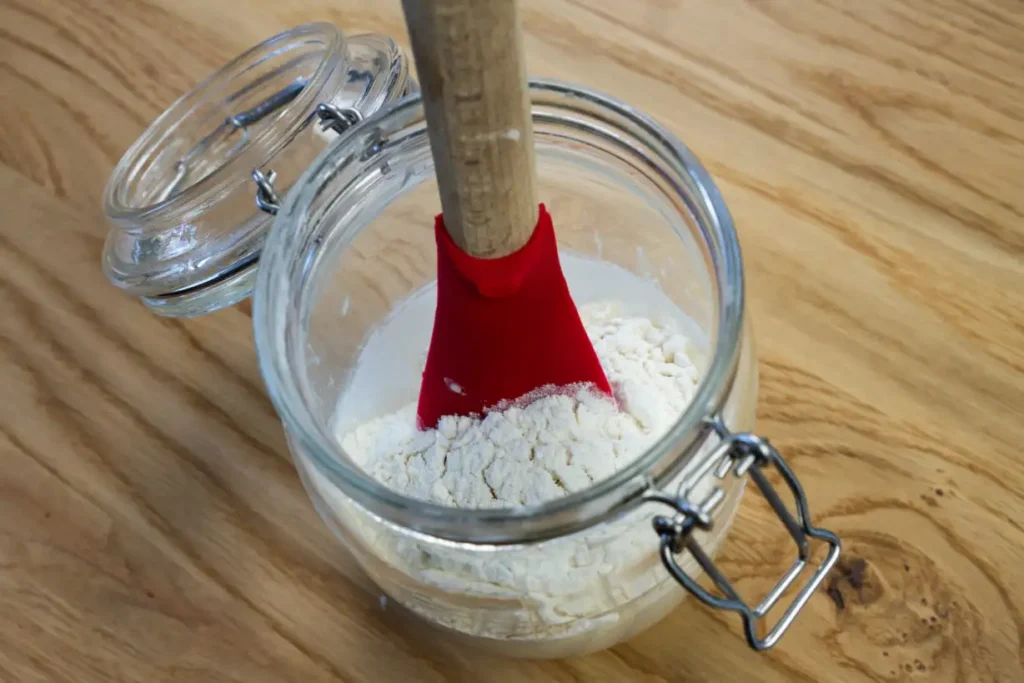
Rubber Spatula
A rubber spatula makes easy work of mixing the flour and water together. They’re also perfect for scraping down the sides of the jar. Any spatula that can fit through the opening of the jar will work great!
Digital Scale
Weighing is the best way to measure the flour and water accurately, and it’s also faster and less messy than using cups! If you prefer using cups, no worries. The recipe includes cup measurements for all of the ingredients.
A rubber band
Choose one that can fit around your jars, to easily mark the level of the starter after discarding and feeding. This way you can easily see how much the starter rose, which is an important part of reading your starter’s cues. You could also use a wet-erase marker to indicate the level of the starter on the outside of the jar.
A thermometer
This is optional, but really useful to have if you’re doing anything to keep your starter warm, to make sure it isn’t getting too warm. I recommend using a digital probe thermometer so you can get an accurate read of the internal temperature of the starter. It will also come handy to take the temperature of a loaf of bread to confirm whether it’s done baking, so it’s well worth the investment. My favourite one is the ThermoPro TP511 Waterproof Digital Candy Thermometer, but any accurate probe thermometer will do the job!
Temperature and sourdough starter
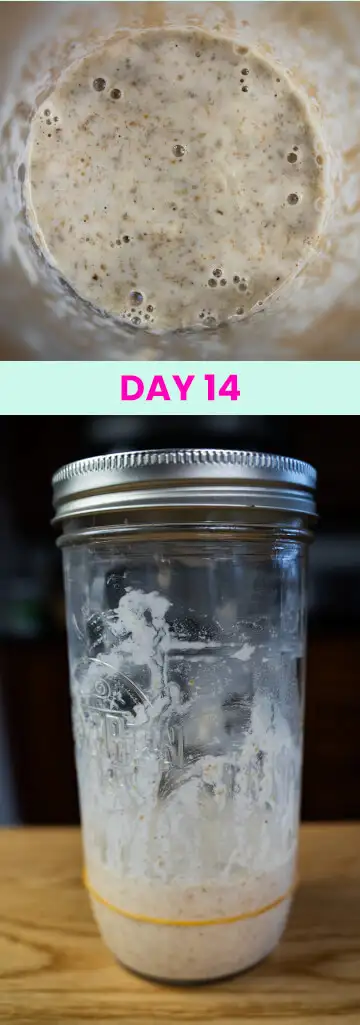
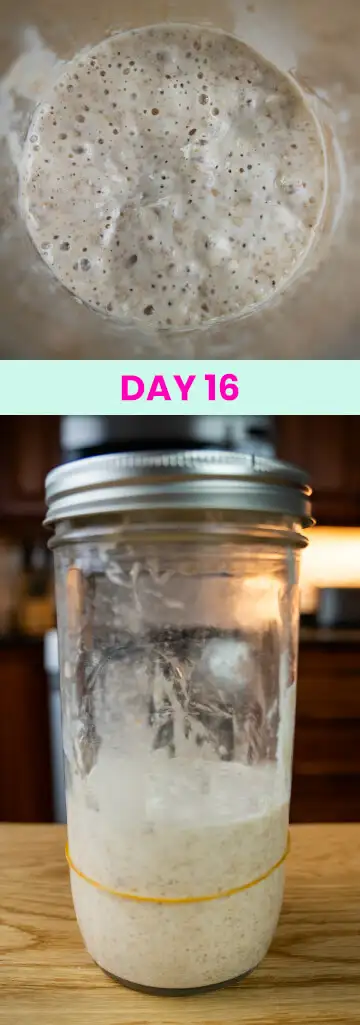
You’ll leave your starter at room temperature while you’re getting it established. Sourdough starter thrives at warmer temperatures, and while around 75-82˚F or 24-28˚C is considered the ideal temperature for starter, it’s also a fair bit warmer than most people keep their homes. Your home is probably much cooler than that, but your starter should still do just fine. As with store-bought yeast, warmer temperatures make the yeast in sourdough work faster, and cooler temperatures will slow it down. The first time I successfully made a sourdough starter from scratch was during the summer. My home was warm and it took me 14 days. For this tutorial I made my starter during the winter. My home was cool and it took 21 days. Room temperature definitely plays a role in how fast your starter will get established.
Unless your home is really quite chilly and your starter isn’t making any progress, I don’t recommend doing anything other than simply leaving your jar on the counter. That said, if your home is on the cool side and you’ve been following these instructions for at least 14 days and it’s still not showing much activity, it wouldn’t hurt to try some of these tips for keeping your sourdough starter warm.
Step-by-step instructions to make a sourdough starter from scratch
I break the process of making a sourdough starter up into three phases. With each phase, I’ll show you what cues you should look out for to decide whether your starter is ready to feed. You’ll also learn how to tell when it’s ready to move on to the next phase
Phase 1: Establish Your Sourdough Starter
This phase usually takes 3-4 days, but as with all things sourdough your mileage may vary! At this stage you’re just getting the starter going, and beginning to cultivate the wild yeasts already present in the raw flour (as well as in the air all around us). I strongly recommend using only rye or whole wheat flour at this stage if you can. The wild yeasts and beneficial bacteria you’re trying to cultivate thrive on the extra nutrients in these flours.
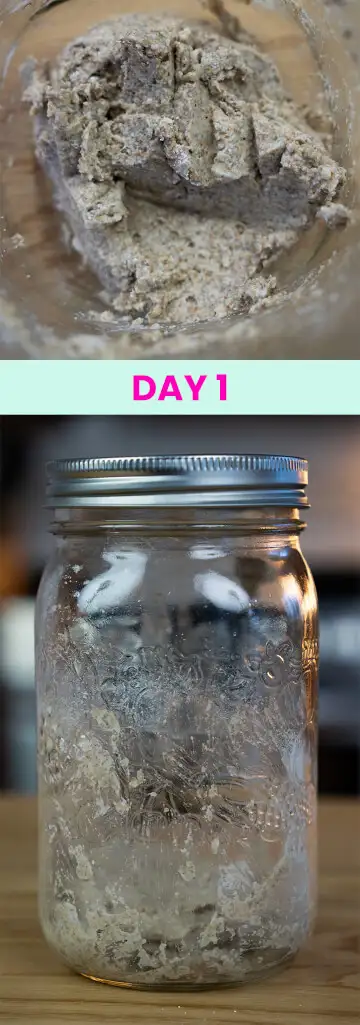
Day 1
If you’re weighing your ingredients, place a clean jar on your digital scale and tare or zero it out. Add 50 grams (or ¼ cup) of water and 50 grams (or ½ cup) of rye or whole wheat flour. Stir until completely combined, and scrape down the sides of the jar. Mark the level of the starter with a rubber band, and loosely screw on the lid. If you’re using a Weck or flip-top jar, remove the rubber gasket and simply place the lid on top. Leave it at room temperature for at least 24 hours.
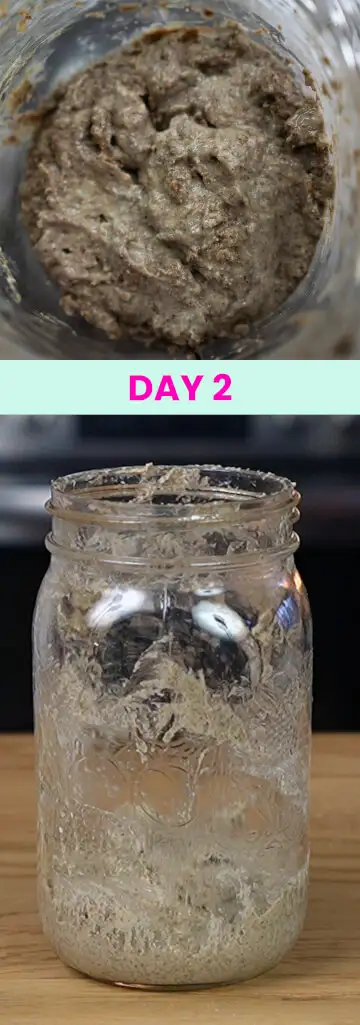
Day 2
You might see some little bubbles on the surface or sides of the jar, or nothing at all yet. Either are completely normal at this stage. To the same jar, add 50 grams (or ¼ cup) of water and 50 grams (or ½ cup) of rye or whole wheat flour. You’re not discarding anything today, just adding to what you mixed yesterday. As before, stir to combine, scrape down the sides, mark with a rubber band, and loosely cover with the lid. Leave at room temperature for at least 24 hours.
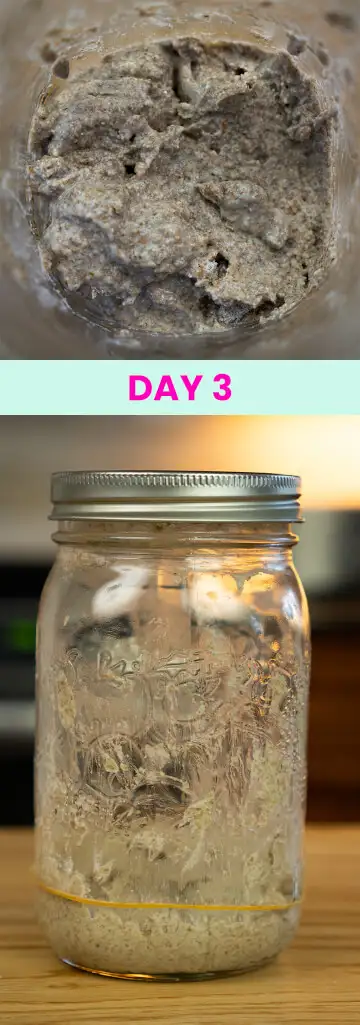
Check for the False Rise
Every day after Day 2, check if your starter has risen. Is it bubbly, has it grown (maybe even doubled or more) since you last fed it? Does it smell bad, maybe like smelly feet, stinky cheese, or worse? If so, your sourdough starter just had what’s commonly known as the false rise! This usually happens sometime around days 2-4. Bad bacteria such as e. coli are on raw flour, and flare up early on when making a new sourdough starter. They produce gases that will make it rise just like an established starter, but it’s definitely not ready or safe to bake with. Once the false rise occurs, you can move on to Phase 2! If you’re not seeing the false rise yet, follow these feeding & discarding instructions:
Phase 1, continued feeding
Not seeing the false rise yet? Measure 50 grams (about ¼ cup) of starter into a clean jar. Feed it with 50 g (½ cup) rye or whole wheat flour and 50 g (¼ cup) of water. Stir to combine, scrape down the sides, mark with a rubber band, and loosely cover with the lid. Leave at room temperature for at least 24 hours and check again for the false rise. Keep repeating these feeding and discarding instructions every 24 hours or so. Once you see the false rise, move on to Phase 2.
IMPORTANT! The discard is not safe to bake with until your starter is fully established. Until then, you’ll have to throw all of the discard into the trash. I know this feels like a waste, but I promise it’s less wasteful to discard. Whenever you feed a starter you have to feed it at least as much flour and water by weight as the starter remaining in the jar. You’d use exponentially more flour by not discarding.
DO NOT let the discard go down the drain or you could be in for a big plumbing bill! Starter/discard dries about as hard as cement and can seriously clog your drain. Wipe your jars and tools down with paper towel as much as you can, and soak in the sink. You don’t have to get every last trace of starter or discard off, just do your best.
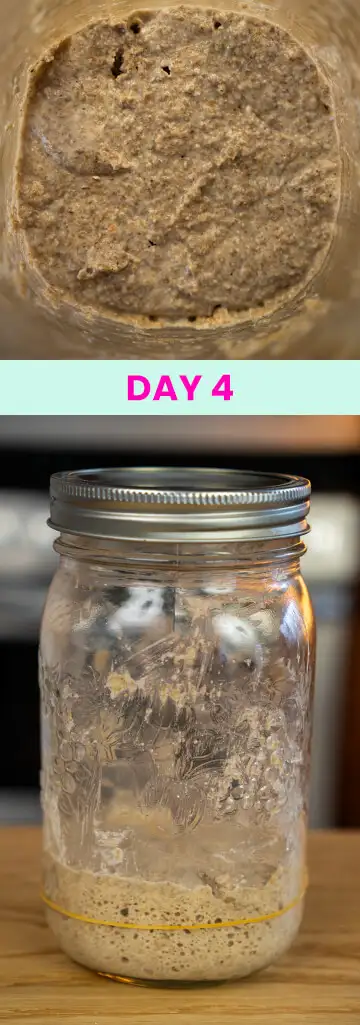
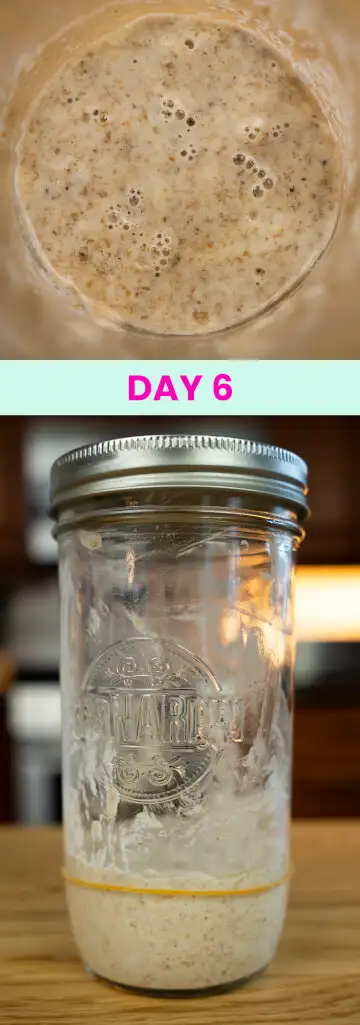
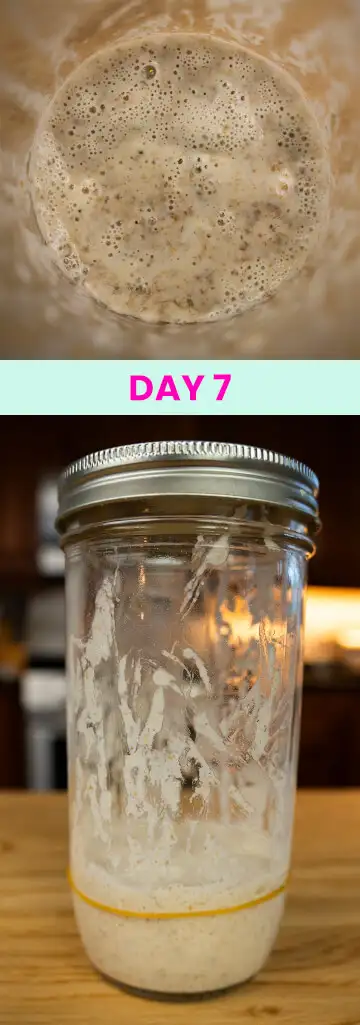
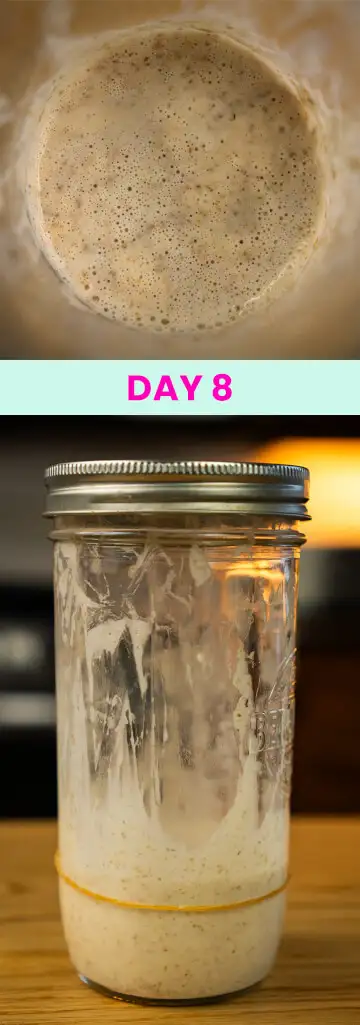
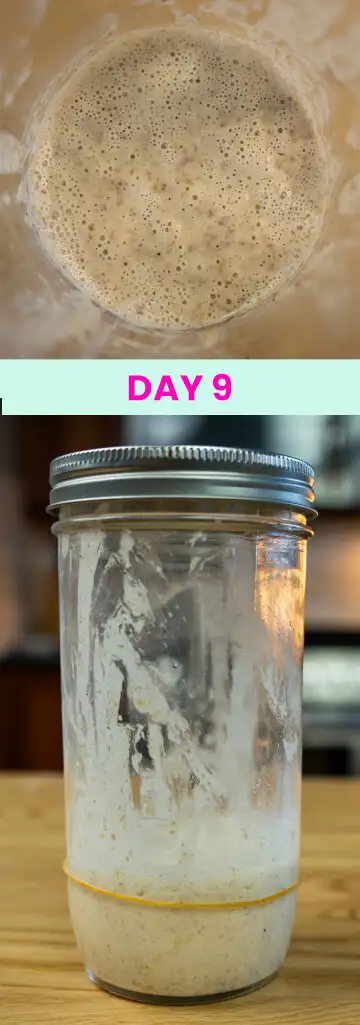
Phase 2: Build your Sourdough Starter
This will likely take anywhere from 3-7 days, but don’t worry if yours takes a bit longer. When I was making this starter during the winter, this phase took me 9 days. Making sourdough starter is a highly variable process, and one baker’s experience can be very different from another’s! After the false rise, you’ll likely notice that your sourdough starter seems to go almost dormant. It’s this point where a lot of beginner sourdough bakers think they’ve killed their new starters and give up. You’ll need some patience and perseverance at this phase. I can guarantee that at some point you’ll feel like it’s just not going to work!
What is the point of Phase 2 (Build)?
During this phase, you’ll gradually switch over from using rye or whole wheat to all-purpose or bread flour. Switching gradually helps the establishing sourdough culture adapt to a new type of flour as its food source. You’ll look for some sign of activity roughly every 24 hours or so before discarding and feeding. The idea is to feed the starter from one peak of activity to the next, or at least as close as you can. This is the best way to increase the population of wild yeasts and beneficial bacteria, which strengthens your sourdough starter! At this stage, even little bubbles on the surface and/or sides of the starter count as a sign of activity. Once your starter gets vigorous enough to double between feedings, it’s time to move on to Stage 3. Please note that the discard is still not safe to bake with at this stage. Continue throwing it in the garbage for now (but never down the drain).
It’s normal if your starter is still very quiet at this stage!
Don’t panic, and definitely don’t give up! The wild yeasts and beneficial bacteria that will ultimately populate your sourdough starter are trying to get established now. Once they do, they’ll lower the pH of your starter (i.e. make it more acidic). That makes the starter inhospitable to bad bacteria, mold, and any other nasty stuff you don’t want growing in it. When that eventually happens, the wild yeasts and beneficial bacteria you do want in your starter will take off!
Phase 2 first feeding
To a clean jar, add 50 grams (about ¼ cup) of your sourdough starter. Feed it with 25 g (¼ cup) rye or whole wheat flour, 25 g (¼ cup) all-purpose or bread flour, and 50 g (¼ cup) water. Stir, scrape down, mark with an elastic band, and cover loosely with the lid. Leave at room temperature for about 24 hours.

Phase 2 continued feeding
Take a look at your sourdough starter. Are you seeing any sign of activity (even small bubbles on the surface or sides)? If not, give it another 4-6 hours and check again. You can even leave it to tomorrow morning and check it again then. If you’re seeing any sign of activity, add 50 grams (¼ cup) of starter to a clean jar. Feed it with 10 grams (about 2 tbsp.) of rye or whole wheat flour, and 40 grams (¼ cup + 2 tbsp.) AP or bread flour. Stir, scrape down, mark with an elastic band, and loosely cover with the lid. Leave it at room temperature for about 24 hours.
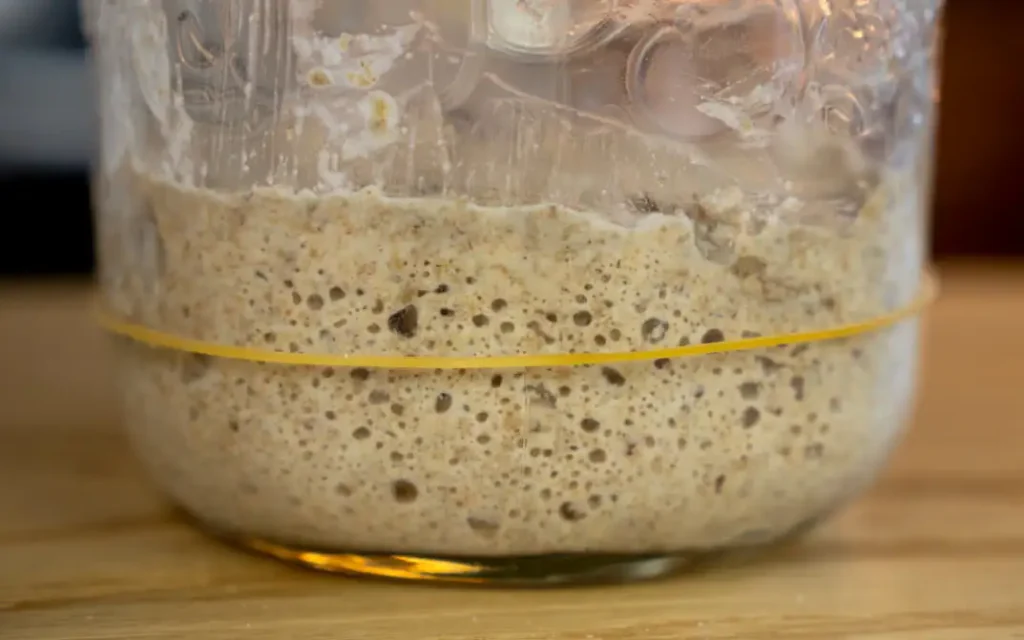
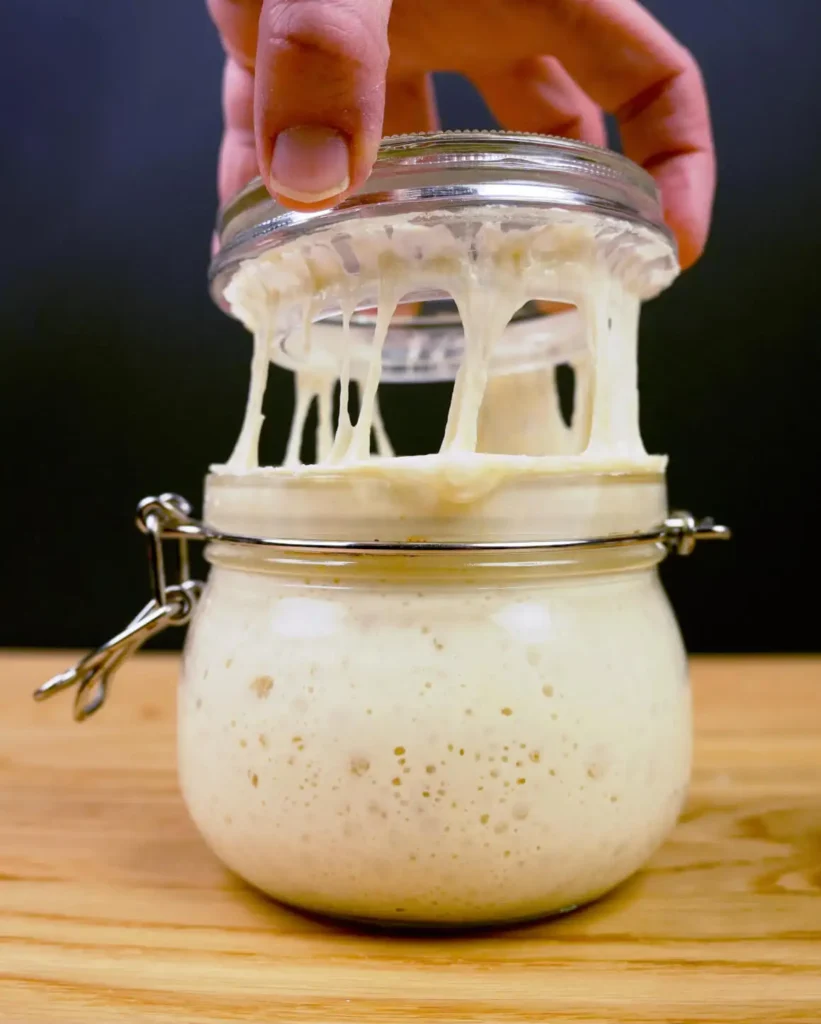
Has your starter doubled (or more)?
If your starter has doubled or more in the 24 hours since you last fed, it’s time to move on to Phase 3! If not, continue repeating the Phase 2, continued feeding instructions above. You’re still waiting to see some kind of activity before discarding and feeding. Do that even if that means waiting more than 24 hours between feedings. You’ll repeat these instructions every day until you eventually see your starter double. It could take a week or more for this to happen. During this time you’re probably going to wonder if it’s ever going to work. Stick to it, eventually it will! If it’s really moving slowly, read my tips for keeping your starter warm. It could be that your room temperature is slowing things down. Keep checking if your starter doubled about 24 hours after each feeding. Once it does, move on to Phase 3!

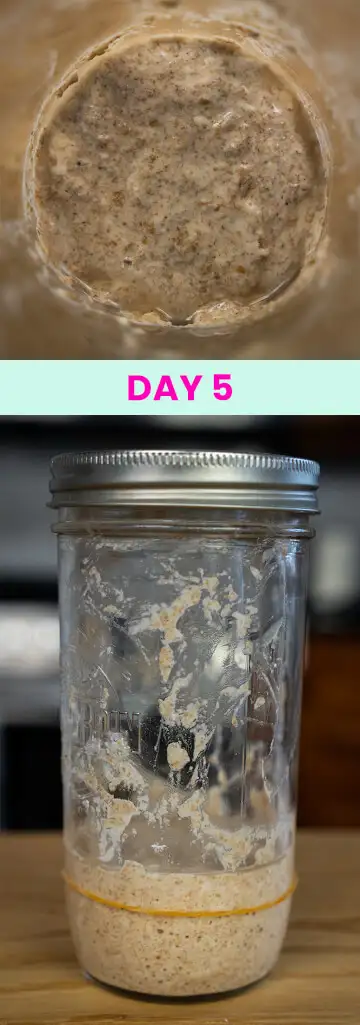
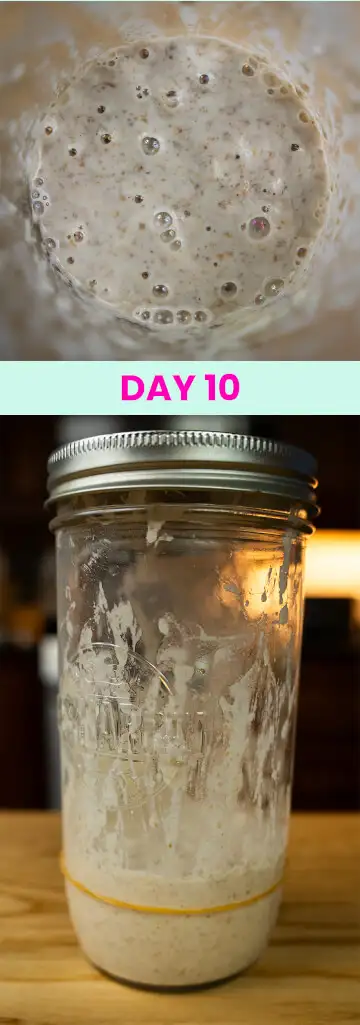
Phase 3: Strengthen your Sourdough Starter
This phase usually takes anywhere between 3-6 days, but don’t worry if it takes you longer. Now that your starter has doubled, it’s almost ready to bake with! At this stage, you’ll switch over to feeding entirely with all-purpose (AP) flour or bread flour. You’re still aiming to feed your starter from peak-to-peak, which helps increase the populations of wild yeast and good bacteria. That strengthens your sourdough starter to get it ready to bake with as quickly as possible! Finally, you’ll be keeping only about 10 grams of starter for each feeding to keep the acidity of the starter well-balanced. Your starter is so close to being ready! For now, keep throwing the discard into the trash until it passes the test for being ready to bake with.


Phase 3 feeding
Measure about 10 grams (about 2 tsp) of your sourdough starter into a clean jar. It can be tricky to weigh such a small amount on most kitchen scales. I like to simply put about a grape-sized blob of starter on the end of my rubber spatula and put the spatula in the jar. Feed it with 50 g (¼ cup) water, and 50 g (½ cup) all-purpose or bread flour. Stir to combine and scrape the sides of the jar down. Mark the level of the starter with a rubber band, and loosely cover the jar with its lid. Leave the jar at room temperature for about 24 hours.
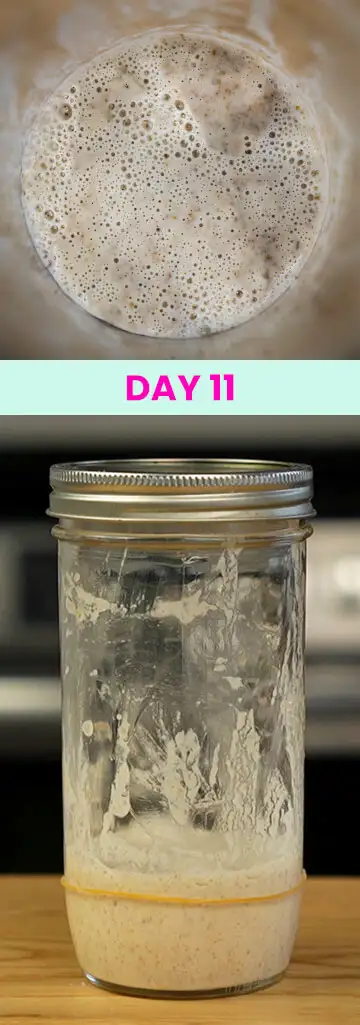
What does your starter look like?
Check every 24 hours or so after feeding:
- It has doubled or more, but hasn’t fallen yet (there are no streak marks above the starter). Perfect! It looks like you caught your starter at or close to its peak. Feed it again as described above, and keep feeding it at about the same time interval.
- It’s above the rubber band, but less than double its original size. There are no streak marks above the starter. Your starter is still rising, and hasn’t reached its peak yet. Check it again in 4-6 hours. You could move it to a warmer spot to speed things up if you like.
- There are streak marks above the starter. Your starter is past its peak. That’s OK! It’s far better to feed a starter after its peak than before. Go ahead and feed it following the instructions above, but feed it sooner next time. If you waited 24 hours between feedings this time, maybe check it at around 12-18 hours next time. Or you can leave less starter in the jar, so it has more food and takes longer to peak.
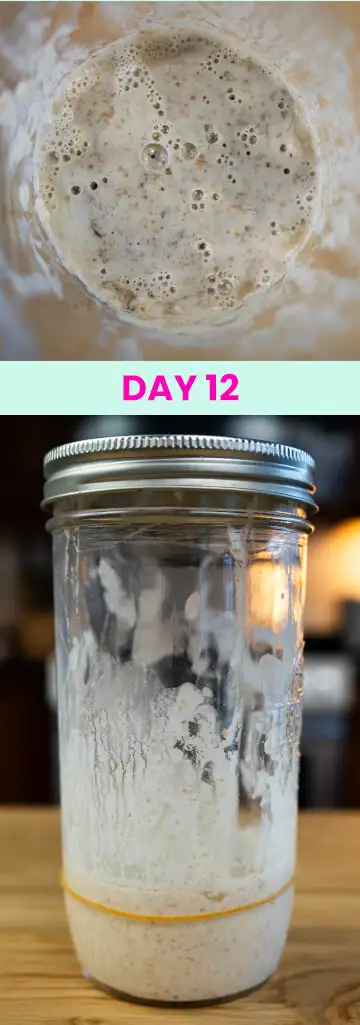
Repeat the Phase 3 feeding instructions for at least 3 days, then start checking if your starter is ready to bake with (see below).

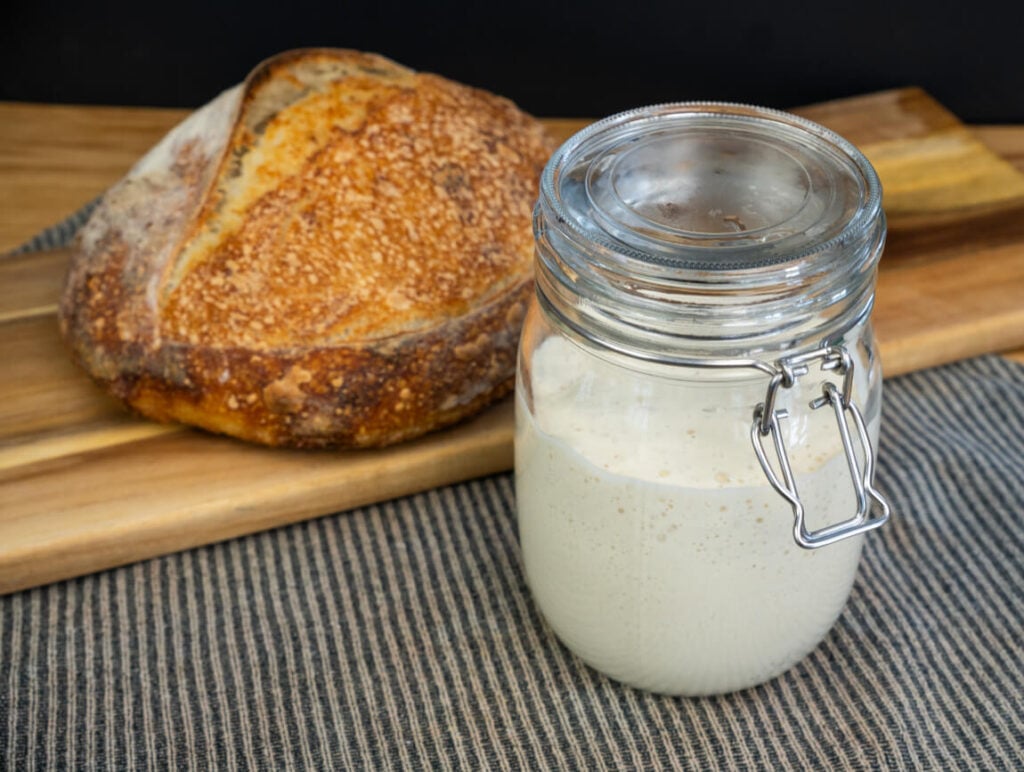
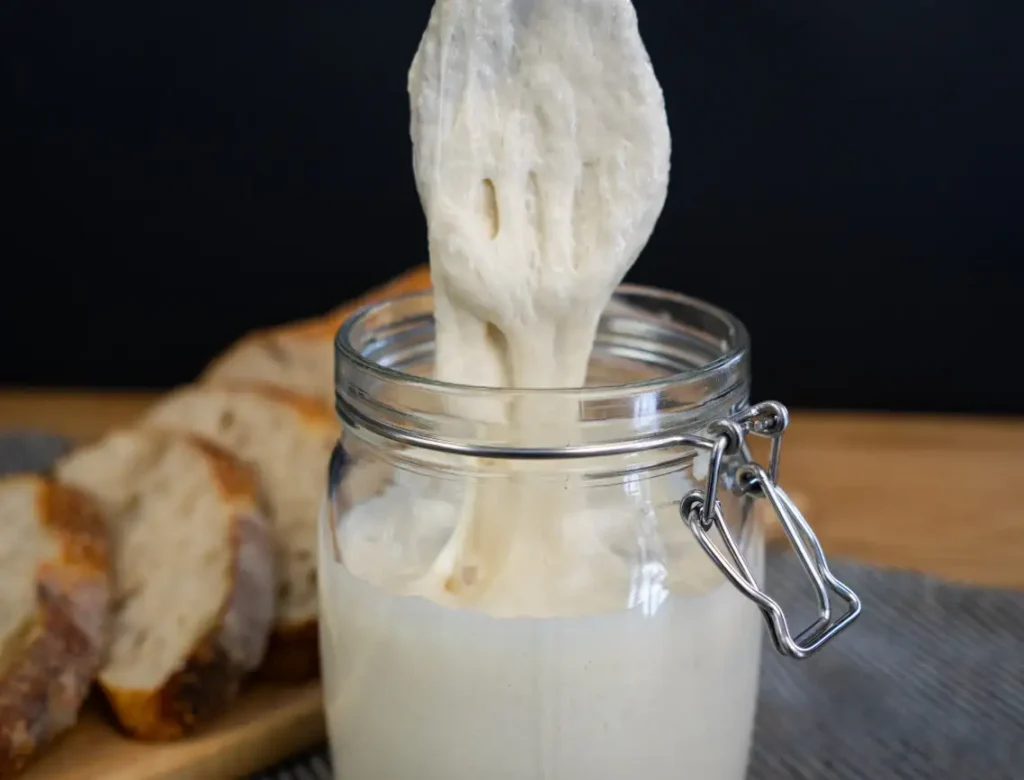
Is your sourdough starter ready to bake with?
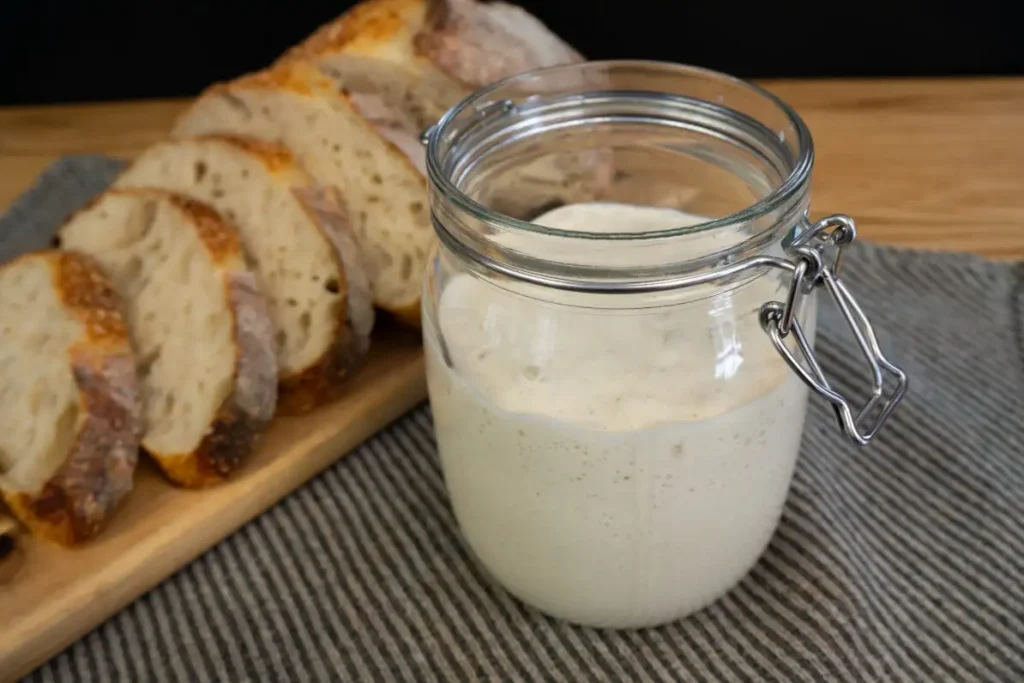
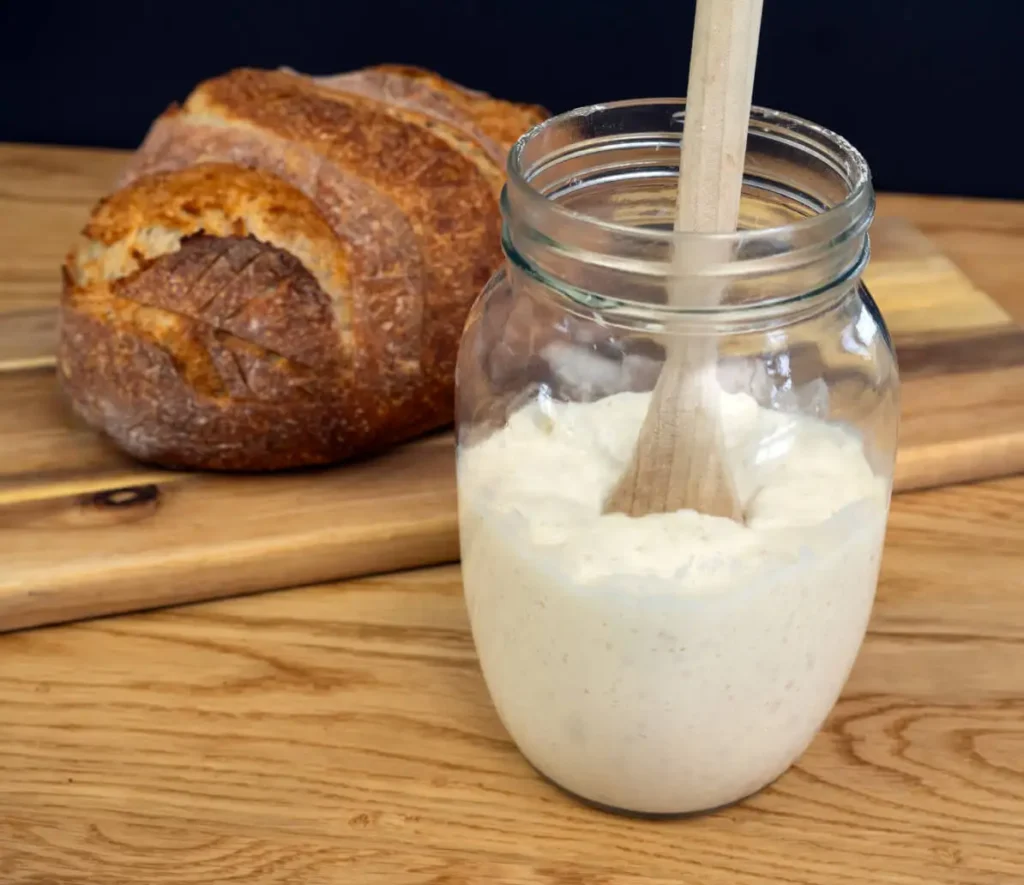
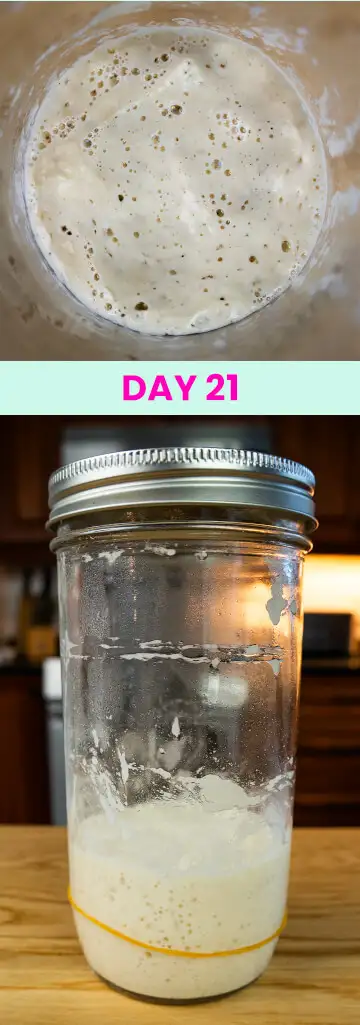
Has your starter doubled (or more) within 12 hours of its last 3 feedings? Does it smell pleasantly sour, yeasty, fruity, or bread-like? Is there no hint left of the gross or funky smells it had early on? If you can say yes to all of the above, your sourdough starter is ready to bake with! You now have an established starter. Hooray!
It’s now safe to save your discard to make all of these yummy discard recipes! And of course, you’ll want to dive right in and start baking delicious sourdough recipes right away. I recommend trying my Easy Sourdough Bread for Beginners recipe first, to start building your sourdough baking confidence. You’ll also want to learn how to feed, store, and maintain your starter so it’s always strong and ready to bake with.
Finally, don’t forget to make a backup of your sourdough starter just in case anything goes wrong. It’s so much easier and faster to revive dehydrated sourdough starter than making one from scratch. It’s well worth having some on hand!
If you’re struggling with any part of this process, leave a comment and I’ll do my best to help!
Beginner Sourdough Starter Recipe
Ingredients
Equipment
Method
- Day 1: To a clean jar, add 50 g (¼ cup) water and 50 g (½ cup) rye or whole wheat flour. Stir until completely combined. Scrape down the sides of your jar, and loosely screw on the lid. Leave at room temperature for about 24 hours.
- Day 2: Leave everything in the jar (do not discard). Add 50 g (¼ cup) water and 50 g (½ cup) rye or whole wheat flour. Stir to combine, scrape down the sides of the jar, and loosely screw on the lid. Mark the level of the starter with an elastic band, and leave at room temperature for another 24 hours.
- Phase 1 continued feeding: Take a look at your starter. Is it bubbly, and does it smell bad? Does it look like it grew (maybe even doubled in size or more) since the last feeding? If so, this is the false rise and you can move on to Phase 2! If not, measure 50 g (about ¼ cup) of starter into a clean jar, and feed it with 50 g (¼ cup) water and 50 g (½ cup) rye or whole wheat flour. Stir until completely combined. Scrape down the sides of your jar, and loosely screw on the lid. Mark the level of the starter with an elastic band, and leave at room temperature for another 24 hours.Throw the remaining starter in the garbage (not down the drain)—it is not safe to bake with yet.
- Keep checking for the false rise every 24 hours or so. It usually happens around day 3 or 4, but your milage may vary! Once the false rise occurs, move on to Phase 2. Until then, repeat the discarding and feeding instructions from Day 3.
- First feeding: Measure 50 g (about ¼ cup) of starter into a clean jar. Feed it with 50 g (¼ cup) water, 25 g (¼ cup) rye or whole wheat flour, and 25 g (¼ cup) all-purpose or bread flour. Stir, scrape down the sides, mark with an elastic band, and loosely screw on the lid as usual. Leave at room temperature for about 24 hours, or until it shows some sign of activity (even little bubbles count!) Keep throwing the discard in the trash for now.
- Phase 2 continued feeding: Measure 50 g (about ¼ cup) of starter into a clean jar. Feed it with 50 g (¼ cup) water, 10 g (about 2 tbsp.) rye or whole wheat flour, and 40 g (¼ cup + 2 tbsp.) all-purpose or bread flour. Stir, scrape down the sides, mark with an elastic band, and loosely screw on the lid as usual. Leave at room temperature for about 24 hours, or until it shows some sign of activity (even little bubbles count!). Keep throwing the discard in the trash for now.
- Has your sourdough starter doubled since the last feeding? If Yes, move on to Phase 3.If No, keep repeating the Phase 2 continued feeding instructions above.
- Into a clean jar measure about 10 grams (about 2 tsp) of your sourdough starter, or just put a grape-sized blob of starter on the end of your rubber spatula and put the spatula in the jar. Feed it with 50 g (¼ cup) water, and 50 g (½ cup) all-purpose or bread flour. Stir to combine, scrape down the sides of the jar, mark the level of the starter with a rubber band, screw the lid on loosely and leave at room temperature for about 24 hours, or until it shows signs of activity. Keep throwing the discard in the trash for now.
- Check: Has your starter has doubled or more within 4-6 hours after the last 3 feedings? Does it smell pleasantly sour, yeasty, and/or fruity (with no more gross or funky smell?) If yes, your starter is ready to bake with and you can start saving any discard to bake with! If no, continue the feeding and discarding instructions above.
Kris says
This looks great. I love sourdough and might give the starter a go!
Joanna Rankin says
Thanks so much! Let me know if you give it a try, I’d love to hear how it goes!
LeeAnn says
Thank you so much for the detailed information! I have been struggling with my starter and I feel like article has given me hope!
Joanna Rankin says
I’m so happy to hear that, and you’re very welcome! I would love to hear how it turns out for you, please let me know how it goes!
Dwon says
For the phase 2 continued feeding, do i just keep measuring out 1/4 of starter, discarding the rest, and adding water and flour every 24 hours? It feels like I’m just wasting flour repeating this every day (4 days now). I’m just wondering if I’m misunderstanding the instructions and om supposed to be just checking for activity every day while leaving the mixture alone. Thanks!
Joanna Rankin says
Hi Dwon,
Yes, you’ll continue measuring out 1/4 cup of starter into a clean jar and discarding the rest. It won’t necessarily be every 24 hours, check for some sign of activity before discarding and feeding (so it might actually be more than 24 hours between feedings at this early stage). I know it seems like a waste, but the discard won’t be safe to bake with yet. And without discarding, the size of your starter would grow exponentially and actually take a lot more flour and water to keep feeding. It’s actually far less wasteful to discard—and before you know it, your discard will be safe to bake with! Keep going, and best of luck with the rest of the process!
Dwon Nave says
Thanks so much for the encouragement! I’ll keep doing what I’ve been doing!
Teresa says
I”m on day 14 of my first attempt at sour dough starter using your recipe. My starter smells acidic. I’m doing 1-1-1 feeds every 23-24 hours. There are lots of little bubbles on top. I’m only getting about 1/4″ rise each time. Is this normal? Do I need to change something?
Joanna Rankin says
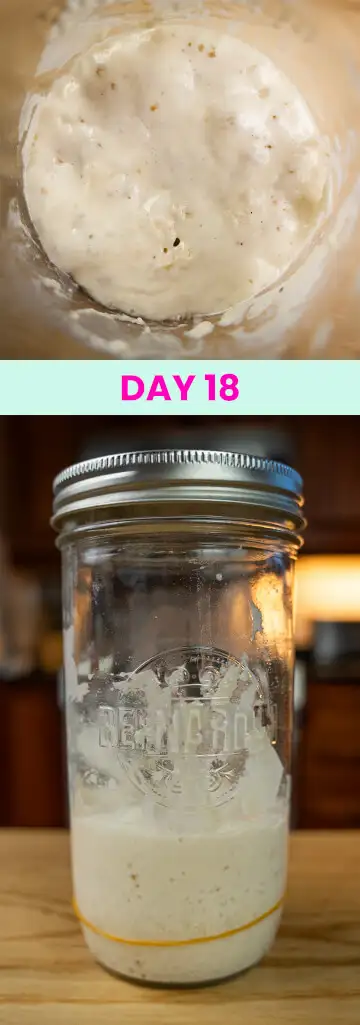
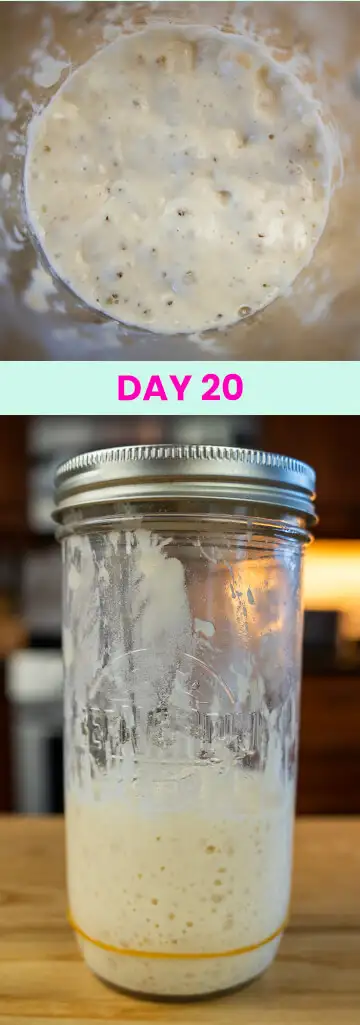
Hi Teresa! That can be normal. My starter wasn’t terribly active around day 14 either, and as I recall it smelled a bit acidic around that time too. When I was writing this tutorial I made my starter during the winter and it was a bit cool in the house, and I think that played a factor because the first time I made a starter successfully was in the summer and it took only 14 days then. Even so this starter eventually did start to take off around day 19 or so. And on day 21 it was obvious to me that it was ready to bake with. Your mileage may vary though, don’t worry if it takes you a bit longer than that! Keep going with the feedings until it’s ready to move on to Phase 3.
If you’re concerned that your house might be too cool, you could try some of my tips for keeping your starter warm. But I would caution you to try that as a last resort. If your house is comfortable enough for you your starter will adapt to it. It’s far more likely that your starter is in the normal dormant stage after the false rise, and the wild yeasts are taking some time to flourish to the point where the starter reliably doubles or more after each feed. It will get there eventually! Keep going 🙂
Jen says
Hi, I noticed my starter at the phase 2 has some thin layer of cloudy-water. Does it means that the starter is hungry and I can start feeding again even if it is below 24 hours?
Joanna Rankin says
Hi Jen!
Did it rise and then fall again? Is the layer of water greyish or dark at all? If so it’s likely hungry!
Another possibility, if the ratio of water is off (there’s too much water relative to the flour in the starter) is that the water is separating out. If your starter didn’t really rise and then this water layer appeared, I would guess this is the reason. This can happen if you’re feeding equal parts by volume (i.e. 1 cup each of flour and water) instead of equal parts by weight, because water is more dense than flour.
Either one is nothing to panic about—if it’s hungry, discard a bunch of it and give it a nice big feeding! And if it’s excess water separating out, feed it just flour until the consistency is like thick pancake batter, and go back to measuring at the next feed. Hope this helps!
Shaku Patel says
Hello Joanna
On 13th day of strengthening, I have to go for emergency trip what should I do? Thank you
Shaku
Joanna Rankin says
Hello! I would just pop it in the fridge before leaving. It should be fine if you’re just going for a few days or so. Much longer than that, I’m not sure.
Jana says
Thank you so much for this information! I do have a question. What ratio should I feed my starter once we get to the maintenance phase and are cooking with our starter?
Joanna Rankin says
That’s completely up to you! The minimum you should feed it is a 1:1:1 ratio (meaning equal weights of starter : flour : water), so there’s enough “food” for the wild yeasts to feed on. Higher ratios will give you more time until the starter peaks, and can also be useful to rebalance acidity (which can be helpful if it’s been a while since you’ve last fed, and the starter smells like alcohol or nail polish remover). I have more information here on how to feed and maintain a starter, hope this helps! https://lowbrowfancy.com/how-to-feed-maintain-store-sourdough-starter/
My says
I’m on day 5 and my starter is extremely active. Today I had to feed it after 14 hours. It smells like yeast. I’m giving it some time to be sure but I think I’m ready to move on to phase 3 soon. Amazing! It’s summer and I’m keeping it next to the fridge which radiates a bit of heat, so that is probably helping. Thanks for great instructions 🙂
Joanna Rankin says
Woo hoo! That’s fantastic news!