Only 10 minutes of hands-on time and some simple shaping stand between you and a batch of these irresistibly chewy New York-style sourdough bagels. Easy to customize with your favourite bagel toppings, you’ll never want to go back to those sad bread rings from the grocery store ever again!
Some links in this post may be affiliate links. Read my disclosure policy.
I’m not exaggerating when I say that I’ve made this sourdough bagel recipe more than anything else in my bread baking rotatio. I’ve made and tested this recipe dozens of times! There’s something I find truly enjoyable about shaping these delicious chewy rings of bread and watching them puff up when they boil. And taking that first bite of a fresh toasted bagel that I just pulled out of the oven an hour ago? Pure heaven. These are easy to make, freeze well (though you might not have any leftovers!) and are so easy to customize with any bagel toppings you like.
Jump To:
- How is this Sourdough Bagel Recipe Different?
- Ingredients & Substitutions for Making Sourdough Bagels
- Sourdough Bagel FAQ
- How to Make Sourdough Bagels Step-by-Step
- Sample Baking Timeline
- Tips for Success when Making Sourdough Bagels
- How to Store Sourdough Bagels
- Topping Ideas for Sourdough Bagels
- What to Make with Sourdough Bagels
- Easy No-Knead Sourdough Bagels (Soft and Chewy!)
How is this Sourdough Bagel Recipe Different?
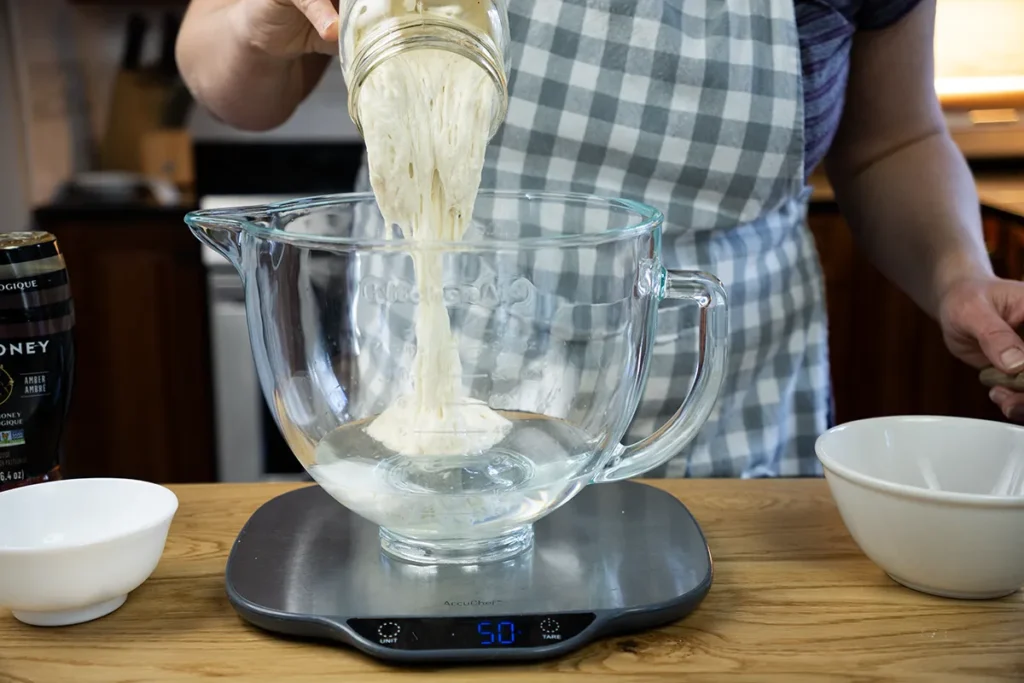
Bagel dough is typically very low-hydration, often around 55% and sometimes even as low as 50%. It can be difficult to combine the ingredients and work with a dough that dry and stiff. For this easy sourdough bagel recipe, I increased the hydration to about 60%. That’s still low enough to result in a beautifully-chewy bagel, while being soft enough to be easy to work with. Some more advanced bagel recipes have you mix a levain and ferment it for 8-12 hours before you mix your dough. I developed this recipe to use plain active starter so you can jump in and mix your dough right away. Finally, this recipe requires no kneading—the long slow fermentation time takes care of developing all the gluten for you!
Ingredients & Substitutions for Making Sourdough Bagels
Sourdough Starter
You’ll need a nice, strong, active starter to leaven these sourdough bagels. If you don’t already have one, it’s not that hard to make a sourdough starter from scratch (I promise!). If you’d rather not make your own, you can ask for some from a local bakery or a buy a dehydrated starter online. Use your starter when it’s at peak or shortly after it has started falling for the most predictable results.
Water
In general, any water that’s safe to drink is fine to use for baking sourdough. If your tap water is chlorinated though, you may want to dechlorinate it first to avoid weakening the wild yeast in your sourdough starter. To dechlorinate tap water, you can leave it out at room temperature uncovered for 24 hours. Alternatively, you can boil it uncovered for 15-20 minutes and let it come back to room temperature before using. You’ll need water both for the dough itself, and later for boiling the bagels. There’s no need to dechlorinate the water used for boiling, only for the dough.
Sugar
Sugar adds a subtle sweetness to the dough, as well as making the dough softer and helping the bagels brown nicely in the oven. I usually use regular granulated sugar, though you can use light or dark brown sugar for a little extra flavour and colour.
Honey
Honey adds more flavour and softness to the dough, and adds a subtle sweetness. You can substitute this with other liquid/syrupy sugars such as molasses, barley malt syrup, or maple syrup. I would avoid using corn syrup as it wouldn’t add any flavour, and could negatively affect the consistency of the dough.

Diastatic Malt (optional)
Diastatic malt is a powder helps improve the enzymatic activity in the dough by breaking down the starch into simples sugars for the wild yeasts in your sourdough starter to eat. A lot of commercial dough conditioners include it as an ingredient because it leads to better fermentation, flavour, texture, and oven spring. You can order diastatic malt online, and one package will last you a long time. I’m still using the first bag of diastatic malt I bought a few years ago and I use it all the time! But if you don’t want to buy diastatic malt, you can absolutely still make this recipe!
Bread Flour
Bread flour has a high gluten content, which is needed to achieve the chewy texture that bagels are known for. You can still make this recipe if all you have on hand is all-purpose flour. Your bagels will still be delicious, just not as chewy. There’s no need to spend extra for organic flour, unless using organic is important to you. Avoid bleached flour if you can.
Salt
Salt adds flavour to the bagels—without it, they’d taste very bland! Apart from that, salt plays a very important role in tightening up the gluten in the dough and helping it form a strong structure. I like using fine sea salt, but kosher salt would work well too. Since salt can vary in size and texture, it’s best to weigh it to make sure you’re adding the right amount.
Baking Soda
Baking soda is used in the boiling water to make it alkaline. This contributes to making the bagels chewy, and it aids in browning as well. A little goes a long way—just a tablespoon or two in the water is all you need.
Molasses (optional)
I like using about 2 tablespoons of molasses in the boiling water. This adds some nice browning to the surface of the bagels, and a little subtle sweetness as well. You could sub this out with honey, barley malt syrup, or maple syrup, or skip it altogether.

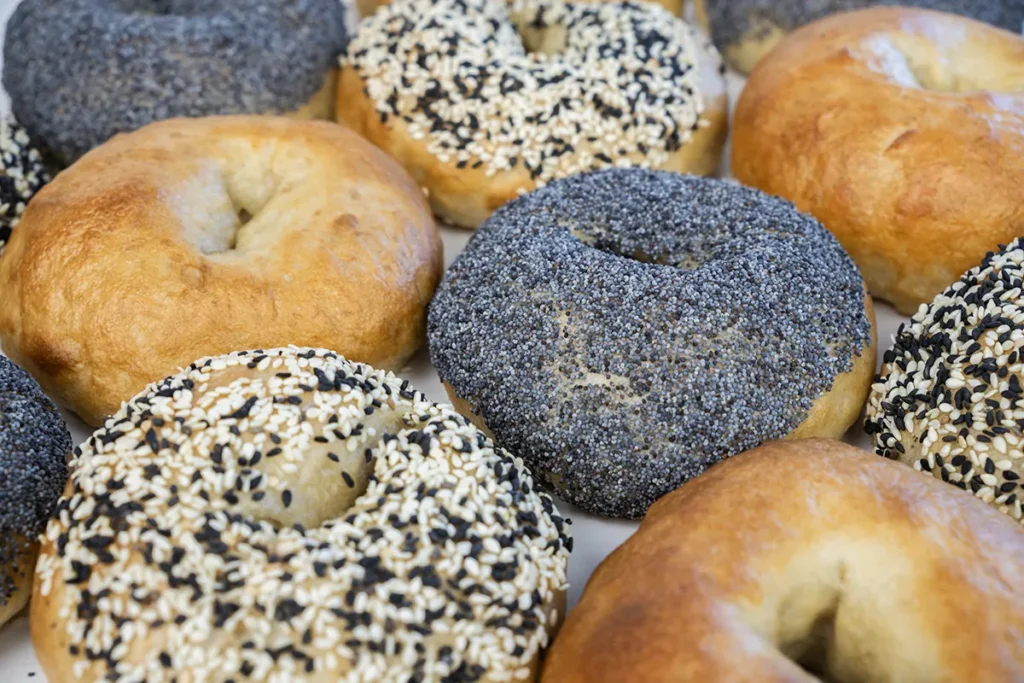
Bagel Toppings
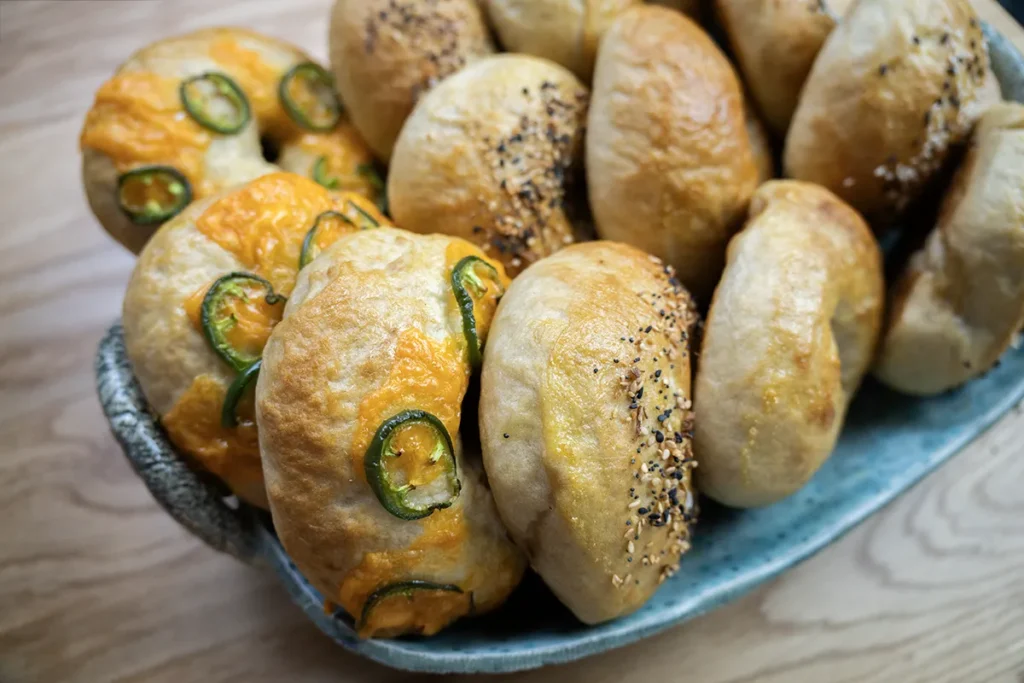
Gather together your favourite bagel toppings like black and white sesame seeds, poppy seeds, and everything bagel spice mix. You could even make jalapeño cheddar bagels by thinly slicing up some jalapeños! Plain bagels are delicious too, if you prefer. You can always mix-and-match by making a few different types of bagels in one batch.
Sourdough Bagel FAQ
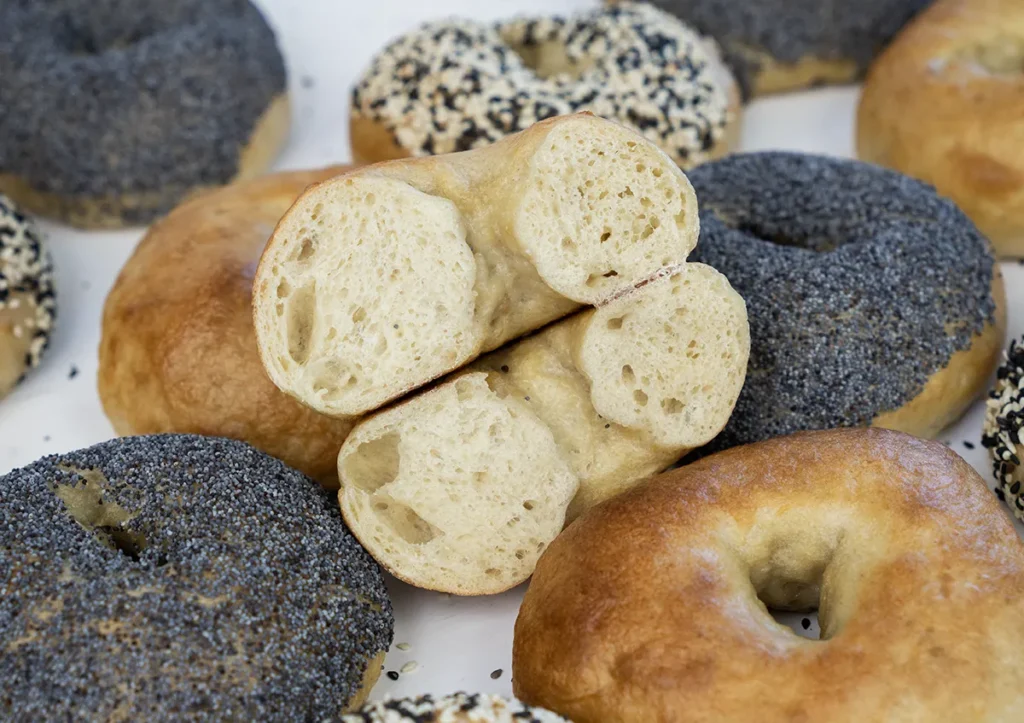
Boiling gelatinizes the starches on the outside of the bagels, making the crust set partially. This means the bagels don’t expand as much in the oven, which makes for a deliciously-chewy interior crumb. Boiling is an essential step in making bagels. Remember—in order to call it a “bagel” it has to come from the boiling region. Anything else is just a sparkling dinner roll!
It’s done for more reasons than just tradition! Bagel dough is a lower-hydration than a typical bread dough, sometimes as low as 50%. They’re known for being chewy and a little bit dense. if it weren’t for the hole in the middle it would be difficult to bake the bagels evenly. A hole in the middle also means that more of the surface of the raw bagel is exposed to the boiling water.
You can boil the bagels for up to 2 minutes per side to get an even thicker, chewier crust.
If you want less-chewy bagels, boil them for only 30 seconds per side.
There are a few variables you could play with that will contribute to making the bagels less dense. Try one or all of these and see if you like the result! First, you could increase the bulk fermentation time, and let the bagel dough double in size before dividing and shaping. After dividing and shaping, let the bagles proof for longer, up to 2 hours or so. Also try boiling them for only 30 seconds or so per time, which will result in a thinner crust that should allow the bagels to expand more in the oven.
Sourdough bagels have a more delicious and complex depth of flavour. Many people find them easier to digest because the long and slow fermentation process partially breaks down the phytic acid and gluten in the dough. In general, sourdough bread also tends to keep longer developing mold because of its higher acidity and these sourdough bagels are no exception!
They’ll still be delicious and about a hundred times better than anything you can get at a grocery store. They’ll just be a little bit less chewy than bagels made with bread flour. If you can get bread flour, I recommend using it for this recipe. If bread flour isn’t available to you, go ahead and make this recipe with all-purpose!
How to Make Sourdough Bagels Step-by-Step

- Add all of the ingredients to a large bowl or stand mixer bowl, and mix until combined. This is a low-hydration dough which some stand mixers may have a hard time with. If your stand mixer sounds like it is struggling, please stop the motor and continue mixing the dough by hand to avoid damaging your mixer. All you’re looking to do at this stage is combine all the ingredients, there’s no need to develop gluten at this stage. Once you don’t see any more dry bits of flour (some residue on the sides of the bowl is fine), you’re done. The dough will look a little shaggy at this stage, that’s normal! Cover the bowl with a damp kitchen towel, plastic wrap, or a dinner plate and rest for 30-45 minutes.
- The resting period helps the dough relax and fully hydrate. You should find it’s softer and much easier to handle now. Use your hands to form the dough into a relatively smooth ball as if you’re making a giant dinner roll. Return it to the bowl and cover it again.

- Leave to bulk ferment at room temperature. Since it’s a low-hydration dough (i.e. it has a relatively low amount of water in it) it will ferment much more slowly than a standard sourdough bread recipe. This stage should take around 8-12 hours, so I like to do it overnight. If your home is warm though, this will happen faster. If it’s your first time making this recipe and your home is warm, do the bulk fermentation during the day so you can check on it regularly and make sure it hasn’t over-fermented. You’re looking for it to increase in volume by about 75%, less than double.
- Weigh the dough, and divide the total weight by 12. You should get a result of around 128-132 grams. Divide the dough into 12 equal portions of that weight. It’s important to divide the dough into equal portions within a few grams of one another, so that all the bagels finish baking at the same time in the oven. If you eyeball this step, you could end up with some bagels that are larger or smaller than the others. Then by the time the larger bagels are done baking, the smaller ones could burn.

- Form each portion of dough into a smooth ball by folding it over itself then cupping your hands around the top and rolling it on your counter. This is just like shaping round dinner rolls. Then poke your thumbs into the middle to make a hole, and gently stretch it out as evenly as you can. Don’t worry if it doesn’t look perfectly even—mine never do, and they always turn out nicely anyway!
- Place the bagels on a baking sheet lined with a silicone baking mat. I don’t recommend using parchment paper, as the raw bagels could stick. Cover the baking sheet with greased plastic wrap, a damp kitchen towel, or a reusable plastic baking sheet cover like this one. Leave at room temperature until noticeably puffier, about 1 hour. They won’t double at this stage.

- After about 30 minutes, begin preheating your oven to 425˚F (220˚C). Arrange the oven racks so one is in the top third of the oven, and the other is in the bottom third. Fill a large pot with about 3″ (7.5 cm) of water. Line a second baking sheet with a silicone baking mat and place it near the stove. You can put your toppings into a bowl if you will be dipping the bagels into it. Add about 2 tablespoons of baking soda and 2 tablespoons of molasses to the water, and bring it to a boil. Once the water starts boiling, carefully drop in as many bagels as will comfortably fit in the pot. Boil for 60 seconds, then flip each bagel over and boil for another 60 seconds.
- Use a slotted spoon or spider to fish each bagel out of the water, and place them on the second baking sheet. Eventually you’ll place boiled bagels on the baking sheet they were proofing on. The goal is to have 6 boiled bagels per sheet, as they will expand significantly during boiling. If using any toppings, add them soon after the bagels come out of the water. For more solid topping coverage, dip the bagels in the topping. Or for less coverage, sprinkle the toppings on.

- Bake both sheets in the oven at the same time, for about 18-22 minutes total. About halfway through the baking time, turn the baking sheets 180 degrees and switch their positions on the racks. When the bagels are done they’ll be golden brown, smooth, and a little puffier. Transfer the bagels to a wire rack to cool completely.
Sample Baking Timeline
The timing of sourdough fermentation depends a lot on the temperature in your home. Take this sample timeline as just a starting point to help you work making this recipe into your life. If your home is warm, expect bulk fermentation to happen faster. On the flip side if your home is cool, the bulk fermentation stage will take longer. Since this is a low-hydration dough, the bulk fermentation stage will take longer than a standard sourdough bread recipe. I like to mix the dough in the evening and leave it to bulk ferment on the counter overnight, then shape and bake my bagels the next morning.
| Time | Step |
|---|---|
| 8:00 PM | Mix the dough. |
| 8:30 PM | Form it into a smooth ball, and leave on the counter to bulk ferment overnight. |
| NEXT DAY | |
| 8:00 AM | Divide, shape, and proof the bagels. |
| 8:30 AM | Preheat the oven, prepare a pot of boiling water |
| 8:45 AM | Boil and top the bagels. |
| 9:00 AM | Bake. |
Tips for Success when Making Sourdough Bagels
- Shape the dough into tight, smooth balls before poking a hole in the middle. Make sure the bottom of the ball is pinched shut so it doesn’t come apart after you stretch the bagel out.
- This recipe makes 12 bagels. If you’re using a stand mixer, you might have trouble fitting this amount of dough in the bowl—feel free to halve the recipe!
- Experiment with how long you boil the bagels for on each side to get the results you like. A longer boil time will result in a thicker crust and chewier bagel, and a shorter boil time will result in a thinner crust and less-chewy bagel.
- Embrace the imperfections in hand-shaped bagels! Perfectly-round bagels are made by machine. An imperfect bagel is a sign it was made with love, by hand.
- Are you finding that too many of your toppings are falling off? Next time brush a little beaten egg on the bagels after boiling to help them stick.
- For an even deeper sourdough flavour or to bake them later when it suits your schedule, transfer the raw bagels on a covered baking sheet to the fridge after shaping. You can keep them in the fridge for up to 2 days.

How to Store Sourdough Bagels
Bagels are best eaten the same day they’re made, though they’ll still be excellent toasted for another day or two. Store any bagels you’ll be able to eat within two days at room temperature in a paper bag or bread box. Slice and freeze any you extras you don’t think you’ll be able to finish within two days, ideally on the same day they were baked (but after they cool completely). That way you can pull one bagel out of the freezer at a time and pop it in the toaster—it will be almost as good as fresh!
Topping Ideas for Sourdough Bagels

There are so many ways you can customize this recipe by adding toppings! Here are just a few ideas:
- Use any of the standard bagel toppings like poppy seeds, a mix of white and black sesame seeds, or everything bagel spice mix.
- Jalapeño Cheddar: Thinly slice some jalapeño peppers, and grate some cheddar cheese. After boiling, sprinkle some cheddar cheese onto each bagel and arrange the jalapeño slices in a single layer.
- Pizza Bagels: Grate any cheese(s) you like using on pizza, and grab some pepperoni slices. After boiling, sprinkle some cheese onto each bagel, and arrange the pepperoni slices in a single layer.
- Cinnamon Streusel Bagels: Make a small batch of cinnamon streusel. After boiling, sprinkle it on top of each bagel and bake as usual.
What to Make with Sourdough Bagels

- Keep it simple! Just toast it and spread on some delicious butter or a generous schmear of your favourite cream cheese.
- Bagels & Lox: Toast a bagel, and add a schmear of cream cheese to each bagel half. Add a couple thin slices of smoked salmon or lox on top of each bagel half. Top that with some thinly-sliced red onion, a few capers, and some chopped fresh dill.
- Breakfast Sandwich: Slice a bagel in half. Use a knife to enlarge the hole in the top slice. Melt some butter in a frying pan or skillet over medium heat. Arrange slices of cheese on the melted butter to be the approximate size and shape of the bagel. Place the bottom bagel slice face down on the melting cheese, and the top slice on the melted butter. Crack an egg into the enlarged hole of the top slice. Cook until the egg is done to your liking, and the cheese is melted and crisp. Remove the bagels from the frying pan, and add your toppings of choice, such as mayo, sriracha, sliced cucumber, avocado, lettuce, or thinly-sliced red onion.
- Pizza Bagels: Preheat the oven to 425˚F (220˚C). Slice as many bagels as you’d like in half. Spread a thin layer of plain tomato sauce (passata) on each slice. Sprinkle on some cheese, and top with your desired pizza toppings. Bake until the cheese is melted and slightly browned, about 8-10 minutes.

If you try this recipe, make sure to leave a comment below! I’d love to hear how it turned out.

Easy No-Knead Sourdough Bagels (Soft and Chewy!)
Ingredients
Method
- Mix the dough: Add all of the dough ingredients to a large mixing bowl or the bowl of a stand mixer. Mix just until combined and no visible dry bits of flour remain (some dry flour residue on the sides of the bowl is fine). If your stand mixer sounds like it's struggling, stop the mixer and continue mixing by hand.
- Cover the bowl with plastic wrap or a dinner plate, and rest for 30-45 minutes. Form the dough into a smooth ball by stretching and folding it over itself, like you're making a giant dinner roll. Return the dough to the bowl and cover.
- Bulk ferment: Leave at room temperature for 8-12 hours, or until not quite doubled in size. You're aiming for it to increase in size around 50-75%.
- Divide and shape: Weigh the dough, and divide by 12. Evenly divide the dough into 12 portions of that weight. It's OK if the portions vary in size by a few grams, the goal is to get close to equal portions. Shape each dough portion into a smooth ball as if you're making round dinner rolls. Use your thumbs to poke a hole in the middle of each ball, and gently stretch it out.
- Proof: Place the shaped bagels on a baking sheet lined with a silicone baking mat. Cover the baking sheet with greased plastic wrap, a damp kitchen towel, or a plastic baking sheet cover. Leave at room temperature to proof for about 1 hour.
- Boil, top, and bake: About 30 minutes into proofing, preheat the oven to 425˚F (220˚C). Arrange the racks in your oven so one is in the top third, and the second is in the bottom third. Line a second baking sheet with a silicone baking mat. Add 3" (7.5 cm) of water to a large pot. Add 2 teaspoons baking soda and 2 tablespoons molasses to the pot, and bring to a boil.
- Once the water is boiling, add as many bagels as will comfortably fit in the pot without crowding. Boil for 60 seconds, then flip to the other side. Boil for another 60 seconds. Use a slotted spoon or a spider to fish the bagels out of the water, and place them on the baking sheet. You should have 6 bagels per baking sheet.
- Soon after the bagels come out of the boiling water, add your toppings. You can either sprinkle them on, or dip the bagels in a bowl of the toppings.
- Bake both sheets at the same time, for 18-22 in total or until the bagels are golden brown, smooth, and a little puffier than when they came out of the water. About halfway through baking, rotate the pans 180 degrees and switch their positions on the racks.
- Transfer the bagels to wire racks to cool completely. Bagels are best eaten the day they're made, but will be excellent toasted for a couple more days.
Meghan says
They look amazing!!
Joanna Rankin says
Thanks so much!
Maggie Ramirez says
So easy to make! I tried 3 different recipes before trying this one and has been a family favorite in my house
Joanna Rankin says
Oh yay, it really makes my day to hear that you loved my recipe! So glad to hear you and your family enjoy it 🙂