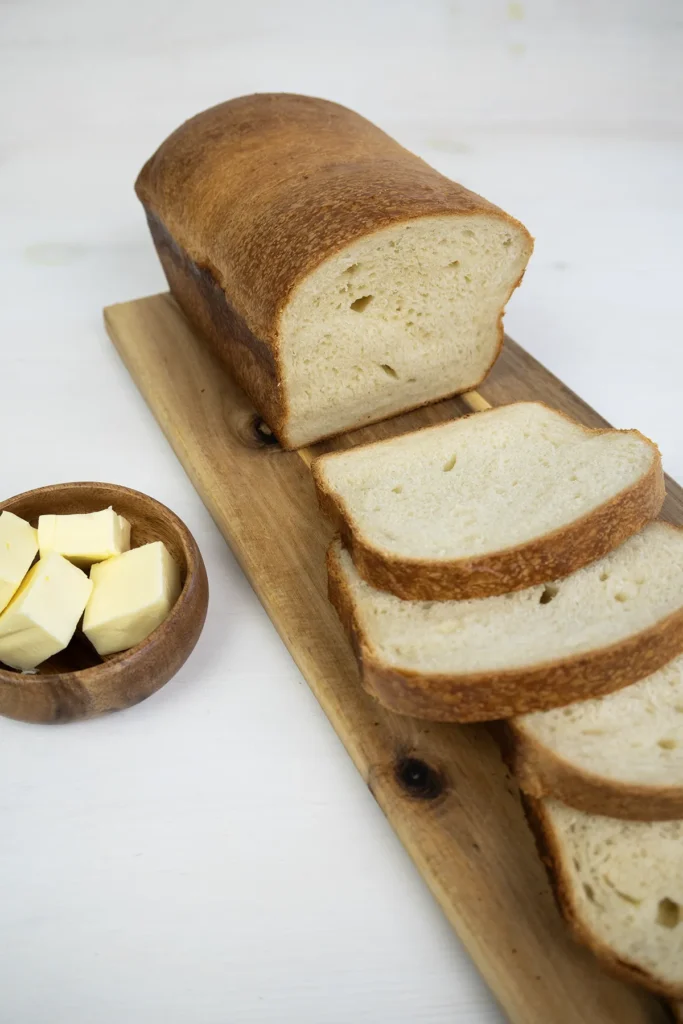
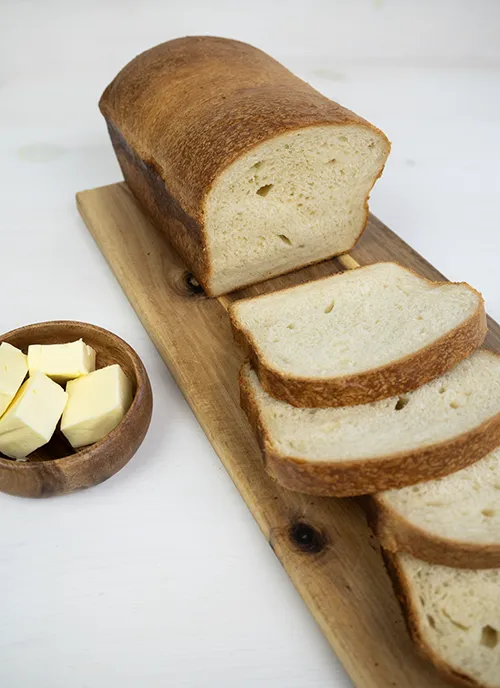
Craving something soft and buttery, but need it to be egg-free? This sourdough sandwich bread has the fluffy texture of milk bread thanks to tangzhong—and it’s perfect for everything from sandwiches to French toast. It’s rich, tender, and stays soft for days!
Some links in this post may be affiliate links. Read my disclosure policy.

Egg prices are out of control, but the good news is that you can absolutely make a soft, fluffy sourdough sandwich bread without them! This bread is inspired by Japanese milk bread, which is famously tall, soft, and fluffy, thanks to using a tangzhong as well as eggs, milk, and butter. This recipe keeps the tangzhong (a cooked flour-and-milk paste), butter, and milk, and achieves a tender, pillowy crumb that stays fresh for days—all without needing any eggs. This bread is moist and tender like a store-bought sandwich loaf, but it’s so much better.

Jump To:
- Why this Sourdough Sandwich Bread is a Game-Changer
- Ingredients You’ll Need
- Tangzhong: The Secret to Ultra-Soft Sourdough Sandwich Bread
- Why You Should Scald Milk for Bread Dough
- If Your Loaf Pan is a Different Size
- How to Make Sourdough Sandwich Bread
- Sample Baking Timelines
- Serving Suggestions
- How to Store Sourdough Sandwich Bread
- Troubleshooting
- FAQs
- Did You Make This?
- Fluffiest Sourdough Sandwich Bread (Without Eggs!)
Why this Sourdough Sandwich Bread is a Game-Changer
- No eggs needed, and this loaf still bakes up soft, fluffy, and perfect for sandwiches.
- It’s not your average sourdough. This brioche-like bread is lightly sweet, with a tender crumb that’s ideal for French toast, sandwiches, and killer grilled cheese.
- It’s mostly hands-off! Let your stand mixer handle all the kneading.
- This recipe fits into your schedule. After shaping, you can leave the dough in the fridge for up to 2 days, then bake it when you’re ready to.
This recipe uses a combination of tangzhong (plus lots of butter) to create that pillowy, soft texture you want in a classic sandwich loaf. It’s still a naturally-leavened sourdough bread, so there’s no added yeast, but the texture is totally different from a rustic boule.

Ingredients You’ll Need
- Milk adds richness, softness, and a little sweetness. It also helps with browning, giving your loaf an irresistible golden crust.
- Bread flour is high in gluten, for the strength and structure you want in a sandwich bread. You can use all-purpose flour in a pinch, but the bread won’t be quite as fluffy and tall.
- Sourdough starter leavens the dough, and adds a delicious complex flavour. Use an active and bubbly starter for the most reliable fermentation (and to avoid an overly-sour flavour). If you don’t already have one, it’s not hard to make your own sourdough starter from scratch . But if you’re not up for making your own, there’s no shame in asking a local bakery or baker if they’ll share some of theirs with you.
- Sugar helps feed the starter and adds a little sweetness to balance the sourdough tang. It also helps keep the crumb fine and tender, essential qualities for a sandwich bread.
- Salt is important not just for flavour. It’s also essential for controlling fermentation and strengthening gluten. I like using fine sea salt, but a fine kosher salt like Diamond Crystal will work great too.
- Unsalted butter is the star of this bread! It adds a ton of richness, moisture, and makes the crumb luxuriously soft.
Pro Tip
Butter is a type of shortening, meaning it will inhibit gluten from forming. In other words, it will “shorten” the gluten strands in the dough, which is where the name comes from! For this reason, you want to add the butter to the dough only after you’ve kneaded it long enough to form some gluten. Then add the butter one piece at a time, waiting until each piece gets fully incorporated into the dough before adding the next.
Tangzhong: The Secret to Ultra-Soft Sourdough Sandwich Bread
Tangzhong is a technique that originated in Japan, and is the cornerstone of pillowy-soft Japanese milk bread. To make a tangzhong, you take a small portion of the flour and water (or milk) in the recipe and cook it into a thick paste before cooling it down and adding it to the dough. This pre-gelatinizes the starches, which means the bread can absorb and hold more liquid, resulting in a soft loaf that stays fresh much longer.

Why You Should Scald Milk for Bread Dough
This recipe calls for scalding the remaining milk that’s not used in the tangzhong. Scalding milk (i.e. heating it until it just starts to steam, then letting it cool back down) sounds old-school, but it’ll really make a difference in the quality of your bread. Normally, milk contains enzymes that can weaken gluten. Gently heating the milk destroys these enzymes, leading to a loftier and fluffier loaf. No need to boil the milk—just bring it to around 180˚F (82˚C), or just around the point where it starts steaming.
Success Tips
- Use bread flour. The higher protein gives the dough strength to rise tall and trap air for a light and fluffy texture.
- Use a stand mixer. This recipe requires a lot of kneading! You could do this all by hand, but do yourself (and your arms) a favour and use a stand mixer if you can.
- Room-temperature butter will incorporate easily into the dough without tearing gluten strands.
- Use the right size loaf pan so the dough will fill it up and dome nicely! I used this 1 ½ pound loaf pan, which measures 5 ½” x 10 ½ x 3″. If your loaf pan is a different size, see the chart below for the ingredient quantities you should use.
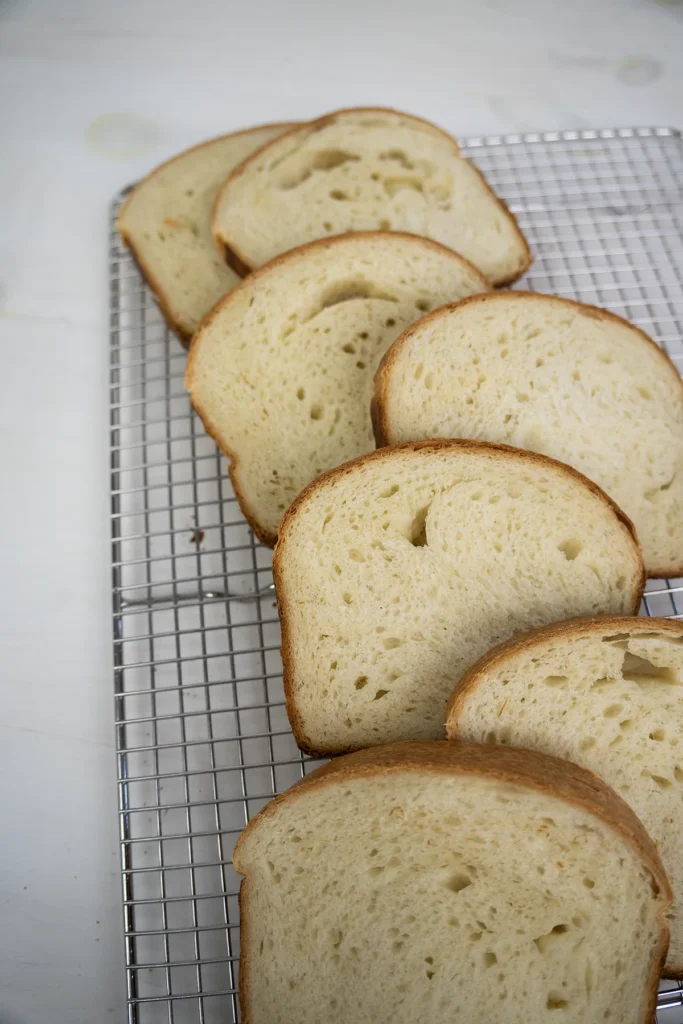
- Let the bread cool completely. The baking process isn’t complete until the bread has completely cooled down! The crumb needs this time to set properly. If you slice into the bread while it’s still warm, you’ll likely wind up with a sad and gummy crumb.

If Your Loaf Pan is a Different Size
This recipe was written to use a 1 ½-pound (680 g) loaf pan that measures 5″ x 10″ x 3″ (12.7 x 25.5 x 7.5 cm). But if your loaf pan is a different size, no worries! Refer to this chart to determine the ingredient quantities you should use so the loaf fits your pan well. If your pan doesn’t perfectly match any of the sizes in the chart, just choose the closest size, it doesn’t have to be exact!
| Ingredient | 1 lb. Loaf Pan 8 ½ “x 4 ½” x 2 ¾” (21.5 x 11.5 x 7 cm) | Small Pullman Pan 9″ x 4″ x 4″ (23 x 10 x 10 cm) | Large Pullman Pan 13″ x 4″ x 4″ (33 x 10 x 10 cm) |
|---|---|---|---|
| Tangzhong | |||
| Whole milk | 100 g | 140 g | 200 g |
| Bread flour | 20 g | 28 g | 40 g |
| Dough | |||
| Whole milk | 175 g | 240 g | 345 g |
| Active starter | 77 g | 105 g | 152 g |
| Sugar | 115 g | 158 g | 228 g |
| Bread flour | 318 g | 437 g | 628 g |
| Fine sea salt | 1 ¼ teaspoons | 1 ¾ teaspoons | 2½ teaspoons |
| Unsalted butter | 110 g | 150 g | 215 g |
How to Make Sourdough Sandwich Bread
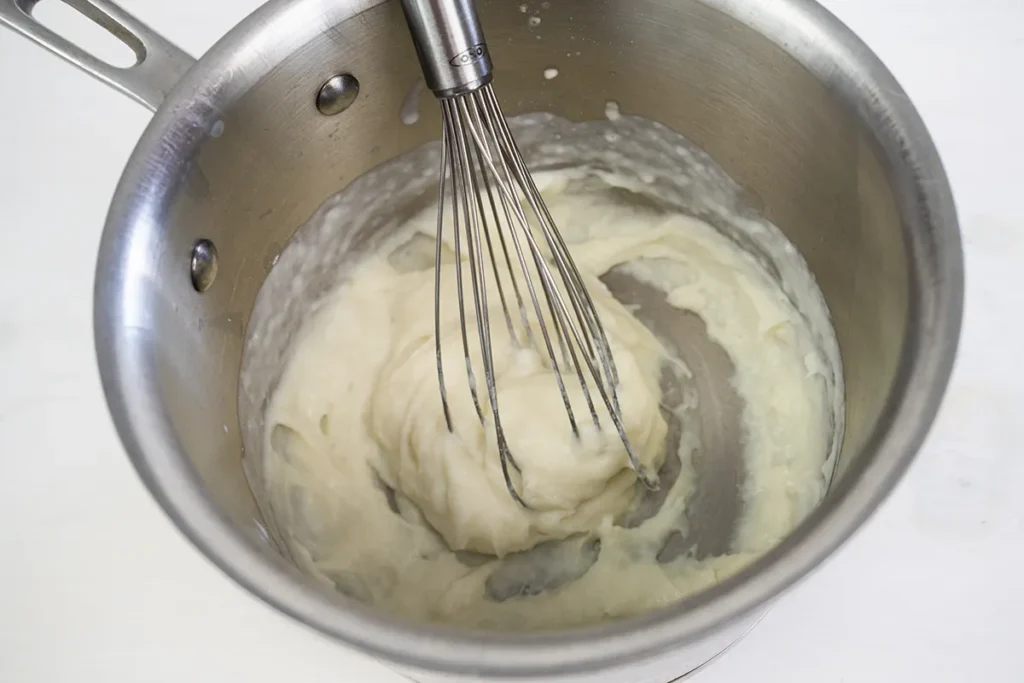
1. Scald the Milk & Make the Tangzhong
Add the milk for the dough to a small saucepan and heat on medium-low just until it starts steaming. If you have an instant-read thermometer, you’re aiming for around 180˚F (82˚C). Transfer the milk to the bowl of a stand mixer. In the same saucepan, add the milk and flour for the tangzhong, and whisk together until completely combined. Cook over medium-low heat while whisking, until the mixture thickens and resembles mashed potatoes. Add the tangzhong to the mixer bowl with the hot milk. Leave both the scalded milk and tangzhong to cool until it’s no more than 85˚F (29˚C).
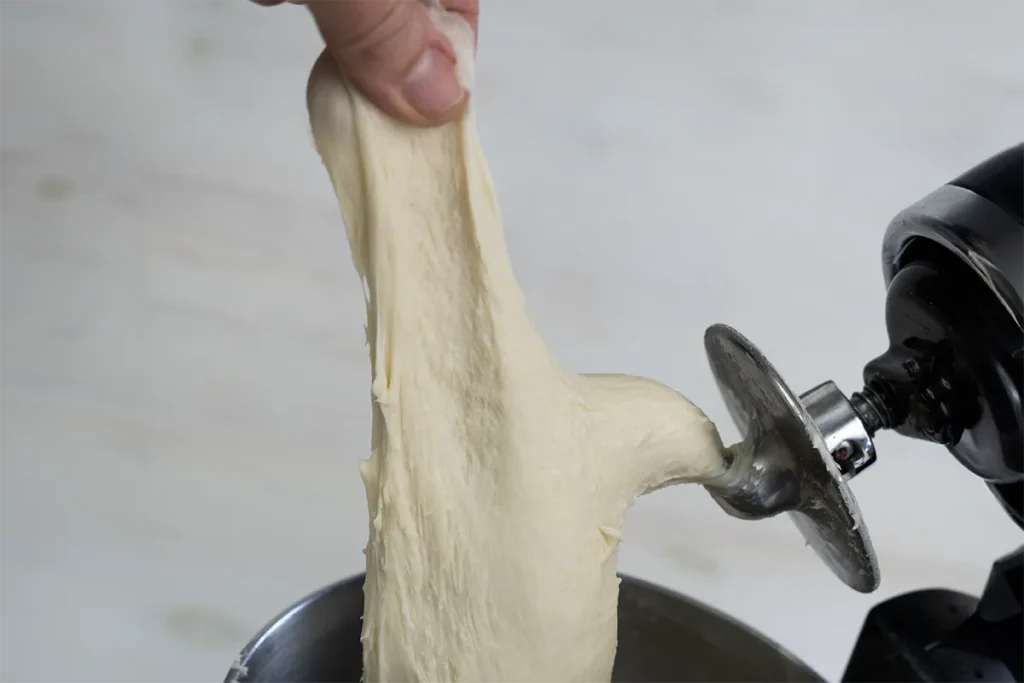
2. Mix & Knead the Dough
Add the remaining ingredients (except for the butter and heavy cream) to the bowl. Attach the dough hook, and mix on low speed until everything is just about combined. Increase the speed to medium and knead until you can pull a piece of dough without it tearing as shown in the photo. That tells you the dough is starting to develop some decent gluten strength, and you’re ready to begin adding the butter.

3. Gradually Add the Butter
With the mixer running on medium-low speed, add the butter one piece at a time. Wait until each piece of butter has been completely incorporated into the dough before adding the next piece. This step can take up to 10 minutes—take your time! Once all the butter has been added, knead for another 2-3 minutes until the dough is beautifully silky-smooth.
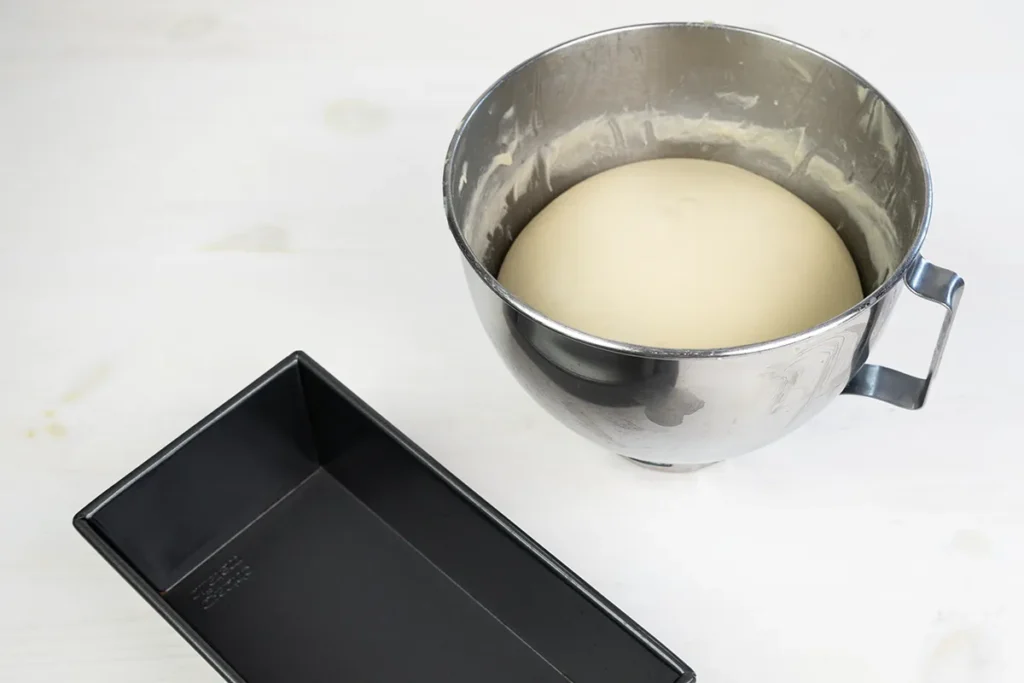
4. Bulk Fermentation
Cover the mixer bowl, and rest the dough for 30-45 minutes. Perform a set of stretch-and-folds (check out my Beginner Sourdough Bread recipe for more info on how this is done). Perform 3 more sets of stretch-and-folds, each separated by a rest period of 30-45 minutes. Leave the dough covered at room temperature until it’s increased in volume by about 75% (i.e. not quite doubled in size).
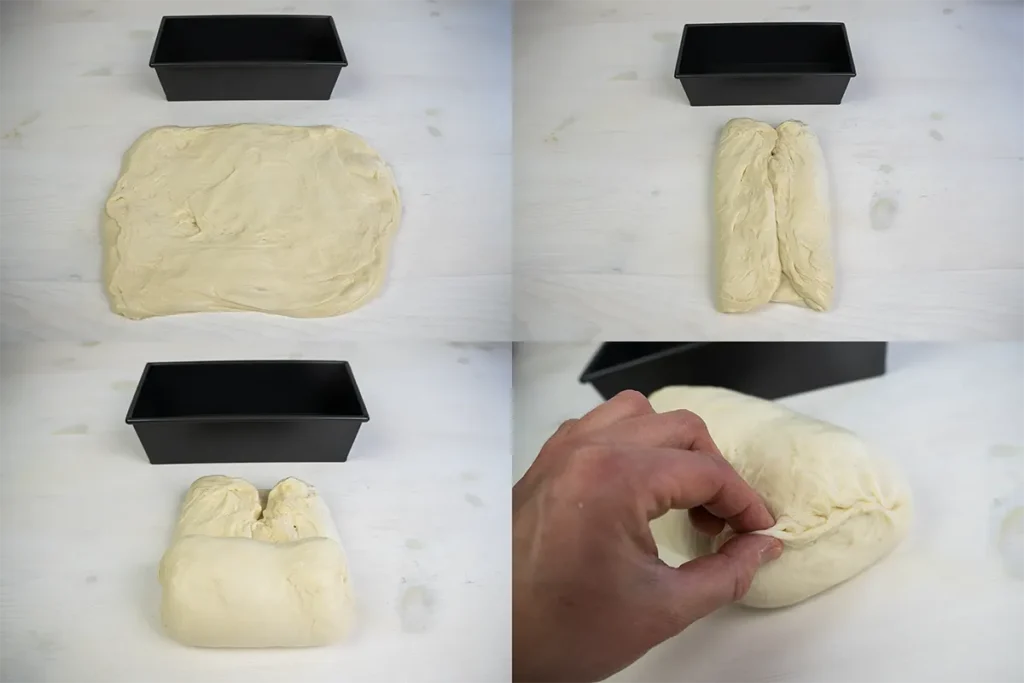
5. Shape
Gently remove the dough from the bowl onto a lightly-floured surface, with the nice smooth side of the dough on the bottom. Stretch it out into a rectangle slightly wider than your loaf pan. Fold the sides into the middle, roll it up, and pinch the seams shut. Roll the log a few times to gently stretch it out to the width of the loaf pan. By the way, I used this 1.5-pound loaf pan, if yours is much larger or smaller you may want to scale the recipe up or down.
6. Proof
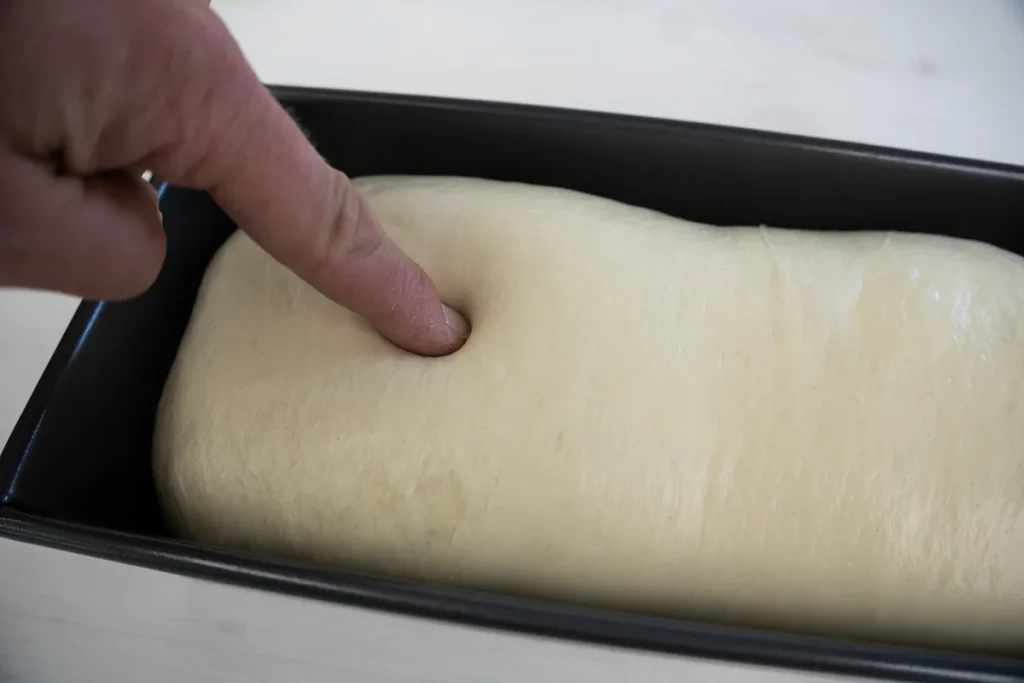
Butter the loaf pan or spray it with baking spray. Place the loaf in the pan seam side down, and cover the pan with plastic wrap. At this point you can either leave it at room temperature for another 2-3 hours to proof and bake the same day, or put in the fridge to cold proof for up to 2 days. The dough is done proofing when you can gently poke your finger into it and the impression slowly fills back in. It should also reach the top edge of the loaf pan, assuming the size of your loaf pan was similar to the one I used.

7. Bake
Towards the end of proofing, preheat the oven to 375˚F (190˚C). Brush the top of the loaf with heavy cream, and bake for 45-55 minutes or until the loaf is golden brown and the inside registers 190˚F-205˚F (88˚C-96˚C). If the crust is browning too quickly, you can tent some aluminum foil over the pan. Immediately remove the loaf from the pan and let it cool completely before slicing into it.
Pro Tip
Enriched doughs like this one rise more slowly than lean doughs. Expect the bulk fermentation to take longer than you may be used to.

Sample Baking Timelines
I’m sharing two sample timelines below (one for a same-day bake and one for baking the next day) to help you plan, but think of them as loose guides, not strict rules. Sourdough doesn’t know what time it is, but it definitely knows how cool or warm your kitchen is: warmer temps speed fermentation up up, while cooler ones slow things down. Check in on your dough frequently the first few times you make this (and whenever the season changes) to get a feel for how it behaves in your kitchen. Trust the cues in the recipe, and always pay attention to your dough instead of the clock.
Weekday/Overnight Timeline
| Time | Step |
|---|---|
| 5:00 PM | Mix & knead the dough |
| 5:30 PM | First stretch & fold |
| 6:00 PM | Second stretch & fold |
| 6:30 PM | Third stretch & fold* |
| 11:00 PM | Shape & refrigerate** |
| NEXT DAY | |
| Any time | Preheat oven |
| ~30 min. later | Bake |
*If your home is cool (like in the winter) you may want to leave the dough on the counter overnight to bulk ferment. It likely won’t finish bulk fermenting in time for you to shape and put it in the fridge overnight. In this case, shape and refrigerate the dough first thing in the morning, and bake later in the day (or up to 2 days later) when you’re ready.
Same Day / Weekend Timeline
| Time | Step |
|---|---|
| 9:00 AM | Mix & knead the dough |
| 9:30 AM | First stretch & fold |
| 10:00 AM | Second stretch & fold |
| 10:30 AM | Third stretch & fold |
| 4:00 PM | Shape & Proof** |
| 6:30 PM | Preheat oven |
| 7:00 PM | Bake |
**If your home is on the cool side, bulk fermentation and proofing will take longer. If fermentation is taking too long and you’re unable to complete the bake the same day, you can refrigerate it and pick up where you left off the next day.

Serving Suggestions
This is a great all-purpose bread! Here are some ideas:
- Obviously, sandwiches! Slice it fresh to make delicious sandwiches or the best grilled cheese you’re ever had!
- French toast: If the bread has gone a little stale, slice and soak in a mixture of eggs and milk or cream plus salt (and some maple syrup if you like) to make some amazing French toast.
- Croutons: Level up your next salad! This is a great way to save bread that has gone very stale. Cut the leftover bread into cubes and toss them in some olive oil and salt (and an Italian seasoning blend if you like). Toast them in a 350˚F (175˚C) oven and toast for about 20 minutes or until golden brown.
How to Store Sourdough Sandwich Bread
- Keep it at room temperature in a bread box or food-safe airtight bag, and it should stay fresh for up to a week.
- Freeze for up to 3 months, in an airtight bag. I like to slice it first, so I can take a slice or two out of the freezer whenever I want and pop them in the toaster.
Troubleshooting
Dense or heavy loaf
Why it happens: Your dough didn’t ferment for long enough, your starter wasn’t strong or active enough, or you didn’t develop enough gluten.
How to fix it: Next time, make sure your starter is active and bubbly, and give the dough more time in bulk fermentation. You may want to knead it a little longer, and maybe give it one more set of stretch and folds to build more structure.
Gummy or dense crumb
Why it happens: This usually happens when the bread was underproofed or underbaked.
How to fix it: Use a probe thermometer to check that your bread is done baking. You’re aiming for the interior of the loaf to hit 190˚F-205˚F (88˚C-96˚C). You may also need to give the dough a little more bulk fermentation and proofing time.
Flat or collapsed loaf
Why it happens: Your dough was overproofed or underbaked. An overproofed bread rises beyond the ability of the gluten to support it. In a severely overproofed dough, the gluten will weaken and fall apart due to the increasing acidity of the fermenting sourdough. And if you take your bread out of the oven before the crumb sets, it will collapse while cooling. You may even notice some raw dough or a large gaping hole in the middle.
How to fix it: Think about what the likely cause of your flat or collapsed loaf was. If it sounds like your bread collapsed due to being overproofed, keep a closer eye on the dough during bulk fermentation and proofing and be careful not to let it go too far next time. Pop it in the fridge whenever you need to slow things down. If it sounds more like your bread was underbaked, use a probe thermometer to check the middle of the loaf so you know for sure it’s done baking—you’re looking for it to reach 190˚F-205˚F (88˚C-96˚C).

FAQs
Yes! Just swap out the milk and butter for plant-based alternatives. Note that there’s no need to scald if you’re using a plant-based milk.
Scalding milk destroys enzymes that can weaken the gluten, so your bread will rise better.
Yes! See my chart above for ingredient quantities for other common loaf pan sizes. If your pan size isn’t listed, just choose the closest size—it doesn’t have to be exact!
Yes, but it won’t rise as much. Your loaf will still be delicious, but expect it to be a little softer and less-structured. All-purpose flour also tends to absorb less liquid than bread flour, so you may want to consider slightly reducing the amount of milk called for in the dough, but keep the tangzhong milk quantity the same.
It’s not absolutely necessary to use a stand mixer, but it does require a lot of kneading to properly develop gluten and incorporate butter. This recipe is similar to brioche in the amount of butter it uses and the way it’s incorporated. If you want to mix and knead this dough by hand, this video tutorial will show you the technique to use, though the recipe they use is different.
Did You Make This?
Please rate the recipe and leave comment below to let me know how it went!
Fluffiest Sourdough Sandwich Bread (Without Eggs!)
Ingredients
Method
- Add 250 g milk to a small saucepan and heat on medium-low until it just starts steaming, or registers 180˚F (82˚C) on an instant-read thermometer. Transfer to the bowl of a stand mixer to cool.
- Add 145 g milk and 30 g bread flour to a small saucepan and whisk together until combined. Heat over medium-low heat while whisking until the mixture thickens and resembles mashed potatoes. Transfer to the stand mixer bowl along with the scalded milk. Cover and leave until both the scalded milk and tangzhong have cooled to no more than 85˚F (29˚C).
- Add 110 g active sourdough starter, 165 g granulated sugar, 455 g bread flour, and 1 ¾ teaspoon fine sea salt to the stand mixer bowl, and attach the dough hook. Combine the ingredients at low speed, then turn the mixer up to medium low (or speed 2 on a Kitchen-Aid) and knead until the dough has started smoothing out and pulling away from the bowl. You should be able to pull a piece up from the dough without it easily tearing.
- With the mixer running, add 155 g unsalted butter one piece at a time. Wait for each piece to incorporate into the dough before adding another. This step can take up to 10 minutes.
- Transfer the dough to a lightly-greased bowl. Cover and rest for 30-45 minutes and perform a series of stretch & folds. Perform another 3 sets of stretch & folds, each 30-45 minutes apart.
- Leave at room temperature to bulk ferment until it has not quite doubled in size. You're aiming for it to increase in volume by about 75%.
- See the post above for sample baking schedules.Butter or lightly grease your loaf pan. Remove the dough from the bowl and onto a clean and lightly-floured counter or work surface. What was the nice smooth top of the dough in the bowl should now be touching the counter. Stretch it out to a rectangle that matches the length of your loaf pan.
- Fold the sides of the rectangle towards the middle, and roll it up. Pinch the seams shut, and roll the log until it once again matches the length of your loaf pan. Place in the loaf pan seam side down, and cover with a lightly-greased piece of plastic wrap.
- To bake the same day, leave at room temperature for 2-3 hours or until the top of the dough just about reaches the top of the loaf pan. If you can gently press a finger into the dough and the indentation slowly fills back in, the dough is done proofing.
- To bake the next day or up to 2 days later, transfer the covered loaf pan to the refrigerator.
- If your dough was refrigerated you may need to leave it at room temperature for a couple hours to complete proofing. Towards the end of proofing, preheat the oven to 375˚F (190˚C). When ready to bake, gently brush about 2 tablespoons heavy cream over the top of the loaf.
- Bake for 35-45 minutes or until the loaf is domed and the crust is deeply golden brown. To be absolutely sure the bread is done baking, you can use an instant-read probe thermometer to check the temperature of the middle of the loaf. You're aiming for an internal temperature of 190˚F-205˚F (88˚C-96˚C). If the crust is browning too fast, tent some aluminum foil over the top.
- Remove the loaf from the pan immediately after baking and leave to cool completely on a wire rack before slicing. Store at room temperature in a bread box or paper bag for up to 1 week, or see the post above for freezing instructions.
Leave a Reply