This pie crust is the secret to achieving perfectly flaky, buttery layers. Made with your choice of butter, lard, or a combination of both, it’s versatile and easy to work with. Ideal for sweet or savory pies, it bakes up golden and crisp every time!
Some links in this post may be affiliate links. Read my disclosure policy.
If you’re a pie lover, you know that a great crust can make all the difference. There’s something magical about that first bite into a perfectly flaky, golden crust that melts in your mouth and complements the filling inside. Whether you’re baking a sweet fruit pie or a savory quiche, this pie crust recipe will give you that deliciously crisp texture every time. What makes it truly special is its versatility—you can use all butter for a rich, indulgent flavor, lard for a classic, extra-flaky finish, or a combination of both to get the best of both worlds. No matter which option you choose, this foolproof recipe is designed to be easy to work with and consistently delivers beautiful results. Perfect for both beginners and seasoned bakers, it’s your new go-to for achieving a crust that’s as impressive as the filling!

Making pie crust from scratch might seem intimidating, but it’s actually much easier than you think—and so worth the extra effort! Not only is homemade crust far less expensive than store-bought options, but the flavor and texture are unbeatable. With my recipe, you’ll learn how to create those delicate, flaky layers that simply can’t be replicated with pre-made crusts. Each fold and roll builds buttery, golden goodness that melts in your mouth, giving your pie a truly homemade feel. Once you try this, you’ll never go back to the store-bought kind again!
Jump To:
Contents
Why You’ll Love my Ultimate Flaky Pie Crust
- It’s SO MUCH BETTER than store-bought! Making pie crust is one of those things that often intimidates bakers, but it’s really not as hard to make as you might think. And it’s truly worth the effort! I promise the taste and flakiness are a hundred times better than anything you can get at a store.
- Make it with butter, lard, or both. Butter makes for a super-flavourful, tender, and rich crust, and it browns really well. Lard has a lower melting point which means that it will quickly melt into and steam up into your dough, yielding a crisp and very flaky crust. It doesn’t brown as quickly as butter, making it a great choice for pies that need a long bake time. I like using a 50/50 combination of butter and lard, especially for savoury pies.
- You’ll have flaky layers for miles! After mixing the crust, I’ll guide you through a layering technique similar to laminated dough (but much easier), creating a delightful combination of dough and butter throughout. When it bakes, the water content in the butter or lard turns to steam, causing the crust to puff up into a beautiful, crisp texture with countless flaky layers. It’s pure perfection!
- It’s a simple recipe, requiring only 4 ingredients. You probably already have everything you need in your fridge and pantry.

Tips for Success
- Chill and rest the dough frequently. After almost every step, make sure to give your dough time to chill and rest—this allows the gluten to relax and keeps the butter firm. After mixing and layering, chill the dough for at least 30 minutes, and once it’s in the pie pan, cover and chill it again for another 20-30 minutes before crimping. Most importantly, always chill the crust before baking, or you risk butter leakage, a tough texture, and a smoky mess in the oven.
- Keep your butter (and lard) cold. Cut your butter into 1/2-inch chunks, and if using lard, do the same. Keep both in the fridge until you’re ready to mix them into the dough. Cold fats are essential for creating those perfect flaky layers!
- Don’t shy away from using your hands. Rubbing the butter into the flour with your fingers helps you control the texture and feel how the dough is coming together. Gently work the butter (or lard) in, then toss everything with water to combine. As long as your hands aren’t too warm, you won’t risk softening the fats too much.
- Don’t overwork the dough, otherwise you risk developing too much gluten and your pie crust will be unpleasantly tough and chewy. Avoid kneading or stretching the dough. During mixing, I like to gently use my fingertips to toss the flour and water together, and start gently squeezing it into a mass once it starts coming together. When forming the layers, you can gently roll it out into a square or pat it out with your hands, then use a bench scraper to cut it into pieces. When you’re rolling out to line your pie pan, start off by banging it out with your rolling pin to start flattening it out as much as possible without working gluten, before rolling out.
- Add just enough water so all of the flour is a little bit hydrated (no dry bits of flour remain) and the dough can just barely stick together and start forming a mass. You might not need to use as much water as the recipe calls for, or you might need to use just a touch more (if so, add it just a tablespoon at a time). When you first mix the dough it should look to you like you haven’t added enough.After mixing when it’s resting in the fridge, the flour will continue to absorb the water and it will come out looking perfect and ready to roll out!
- Use 1 tbsp. of vodka or distilled white vinegar per batch in the water, if your crusts tend to come out tough and chewy. Vodka and vineger discourage gluten formation, so they’re like an insurance policy against over-working your dough. I only use water in my pie crusts and they turn out great—but this is worth trying if you have a hard time with your crusts turning out tough. To use this tip, first measure out 1 tbsp. of vodka or vinegar per batch into a measuring cup, then top it off with enough ice cold water to make up 1/4 cup per batch of water. Use this mixture to hydrate your dough.
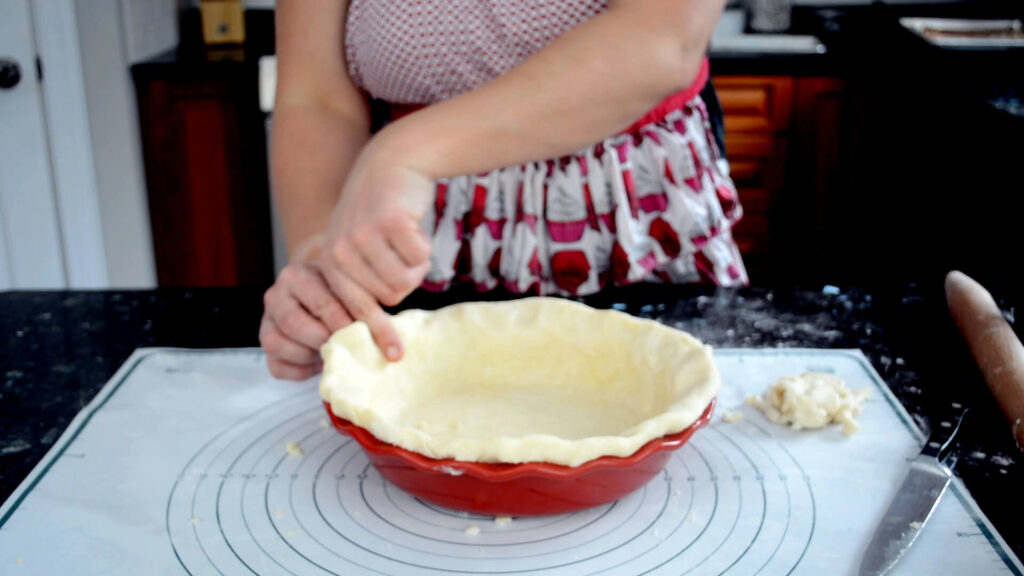
- Line your pie pan tightly. Use your fingers and palms to press the dough along the bottom and up the sides of the pan, making sure there aren’t any gaps or air bubble between the crust and the pan. Otherwise the crust will bubble up as it bakes.
- Make enough pie crust for your needs! This recipe is enough for a standard 9″ pie pan. If you’re making a deep dish pie (like my Deep Dish Breakfast Pie recipe) you’ll want to make a double batch. If you’re making a double-crust pie, make a double batch. And if you’re making a deep dish pie with a top crust, you’ll want to make a triple batch.

Ingredients to make Ultimate Flaky Pie Crust
- All-purpose flour has a medium gluten content—enough to give your pie crust some structure, and not so much that your crust is chewy like bread. Just make sure not to overwork the dough when you’re mixing and folding the dough so you don’t develop too much gluten.
- Unsalted butter, if you’re using butter, is the best choice as it allows you to control the salt content in the dough. If all you have on hand is salted butter that will work too, but remember to use only half the salt the recipe calls for. Butter lends a ton of flavour and richness to a pie crust, and has a higher melting point than lard.
- Lard has a lower melting point than butter—when it hits the oven, it quickly melts into your dough and its water content quickly turns into steam, yielding beautifully crisp and flaky layers. Use a high-quality leaf lard if you can find it, though I usually just use a brick of standard grocery store lard and it works just fine!
- Salt adds flavour to the crust—without it, it would taste very bland. If you’re using a salted butter, you can cut the amount of salt called for by half.
- Water needs to be ice cold, so the butter or lard don’t melt into and combine with the dough. I like to half-fill a measuring cup with ice cubes and then pour water over the cubes. When I’m ready to add the water to my dough, I’ll measure out how much I need into a smaller measuring cup.

How to Customize Your Pie Crust
Add up to 1 cup of grated cheese per batch for extra flavour. Toss it with the flour and butter before adding water. Drier cheeses like cheddar or parmesan work best, but feel free to experiment! A cheddar crust would be amazing with an apple pie! If using melty cheeses like cheddar, spray your pie pan with baking spray to prevent sticking.
Add 1-2 tsp. of ground spices per batch to elevate your pie crust. For sweet pies like apple or pumpkin, try cinnamon, nutmeg, ginger, or a pumpkin spice blend. Try grinding dry black tea to a fine powder, or adding some chai tea for a unique twist. For savoury pies, experiment with spices like chili powder, turmeric, smoked paprika, oregano, or garlic powder to complement the filling beautifully! You could also add about a tablespoon of cocoa or dark cocoa powder to add some flavour and dark colour to the dough. To add ground spices, whisk them with the flour and salt before adding the chunks of butter.
Experiment with adding other liquids. Milk or buttermilk would add a flavour, tenderness, and richness to your crust, while something like beet juice would add flavour and a beautiful colour. Apple juice is a great choice for an apple pie crust. You could try infusing your water with tea leaves (Earl Grey-infused water could be delicious with a custard pie!), or brew some coffee and use that to hydrate your dough. The sky is the limit—have fun experimenting with tweaking this base recipe to add more colour and flavour to your pie! Whatever liquid you use, make sure it’s ice cold before you add it to the dough!
FAQ
Can I make this ahead?
Yes! There are a few options for making ahead:
To store in the fridge: Mix up the dough, and after forming your layers wrap it tightly in plastic wrap and leave in the fridge for 2-3 days, ready to roll out.
To store raw dough in the freezer: You can also put the crust in the freezer after mixing, tightly wrapped in plastic wrap and inside a freezer bag. But my favourite way to store it in the freezer is to roll it out first: Line your pie pan with plastic wrap, then roll out your crust, line your pie pan on top of the plastic wrap, crimp the edges, and cover with more plastic wrap. Freeze until firm, then pop the crust out of the pie pan and store it tightly-wrapped in your freezer. I recommend storing it in a large plastic container to protect it from breaking. This way you can take the unbaked pie crust out of your freezer and bake it from frozen, whenever you want a fresh-baked pie. If you’re making a double-crust pie that has a top crust that gets crimped together with the bottom crust, put the crust back into the pie pan you used to shape it (without any plastic wrap this time), and leave it to soften in the fridge. Then add your fillings and your top crust and crimp it together with the bottom crust. Unbaked pie crust lasts up to 6 months in the freezer, but for the best flavour and texture you should use it within 3 months.
To store pre-baked dough in the freezer: Follow the directions for par-baking or pre-baking your crust. Allow it to cool completely to room temperature. I recommend remove it it from your pie pan before tightly (but gently) wrapping it in plastic wrap. Then store it in a rigid airtight container in the freezer to prevent breakage. Let your crust come to room temperature, then pop it in the same pie pan you used to pre- or par-bake it. Use pre-baked frozen crusts within 1 month for the best flavour.
Why do you sometimes pre- or par-bake a pie crust?
Some pie fillings don’t get baked, and need to be put into a fully-baked pie crust (a “pre-baked” crust, in other words). Some fillings only take minimal baking, and if they were put in a raw crust the crust wouldn’t have time to bake thoroughly by the time the filling was baked. That’s when you want to par-bake (or partially bake) your crust, so it has a head start on baking and getting nice and flaky before the filling goes in. In fact, if you’re not adding a top crust that needs to be crimped together with the bottom crust it’s almost always a good idea to par-bake your crust as some insurance against “the dreaded soggy bottom”.
How do you pre- or par-bake a pie crust?
Roll out your dough and line your pie pan. Crimp the edges, then tightly cover with plastic wrap and chill the crust in the fridge. While the crust is chilling, preheat your oven to 425˚F (220˚C). Once the oven is preheated and your crust has been chilling for at least 20 minutes, remove the crust from the fridge, take off the plastic wrap, and poke holes all over the bottom with a fork. Crumple up a sheet of parchment paper or aluminum foil, and form it to the shape of the pie crust. Fill it all the way to the top with dried beans, rice, sugar, or ceramic pie weights. If you’re using ceramic pie weights you’ll need to use several sets—one set isn’t enough to fill your crust. If you don’t fill it with some kind of weight all the way to the top, the edges of the crust will slump down as it bakes!
Bake for 15-17 minutes, then carefully remove the parchment or foil along with all the weights. Brush all over the bottom and sides with egg wash to seal the crust and prevent it from absorbing liquid from your filling. You can also add a layer of grated cheese as a moisture barrier if you’re using a savoury filling that goes well with cheese. If you’re only par-baking the crust, return it to the oven for another 3-5 minutes just until it’s no longer shiny. If you’re completely pre-baking the crust, bake it another 7-10 minutes or so or until it’s beautifully golden (keep a close eye on it!).
How do I prevent a soggy bottom?
If you’re making a single-crust pie, the best thing to do is pre- or par-bake your crust (see instructions above).
But if you’re making a double-crust pie, par-baking isn’t really an option. In that case, you’ll want to put a ceramic or metal pizza stone in the oven while it’s preheating. That will radiate lots of extra heat towards the bottom of your crust, helping it bake through while the filling is baking. If you use a transparent glass pie pan, you can lift it up to check whether the bottom of the crust looks like it’s baked through.
What kind of pie pan should I use?
There are so many options, from glass, metal, and ceramic, to cast iron. Really, you can use any pie pan you like—each material has its advantages and disadvantages:
Glass pie pans give you a handy window into how the bottom of your pie crust is baking. You can literally just lift it up and see whether the bottom crust is nice and golden, or needs more time in the oven. They’re also relatively inexpensive and light, and usually made of tempered or borosilicate glass so they’re durable, too! I wouldn’t bake in a glass pan straight from the freezer, though, or you’ll risk shattering the pan from thermal shock. Glass heats up relatively slowly, allowing for a gentle and even bake.
Metal pans are inexpensive and durable, and they conduct heat well so your crust will bake quickly and thoroughly. They also cool down more quickly than other materials, and can be baked straight from the freezer.
Ceramic pans are beautiful, and come in a wide range of colours. They’re lovely for serving your pie at the table! They often have a beautiful scalloped edge that will nicely hold up the crimped edge of your pie crust. They’re heavy, and usually pricy (especially high-quality ones like those made by Emile Henry). Some can bake straight from the freezer (like Emile Henry pans), but some can’t—make sure you read the manufacturer’s instructions to make sure. Ceramic pans heat up more slowly than other materials, but they retain the heat for a long time. They’re a great choice when you’re making a pie with a long bake time.
Cast iron pans make for great, crisp crusts. They heat up quickly and evenly, and retain heat for a long time. You can even use a cast iron skillet—no need to run out and buy a special cast iron pie pan. It also just has a great rustic charm!
Disposable aluminum foil pie pans can work, but they’re not my favourite to use. They’re often flimsy (making it difficult to get the pie in and out of the oven without spilling or breaking), and aren’t as good at distributing and retaining heat. If you’re making a pie to give away, you could put the crust in the disposable pie pan and then put that into a metal, glass, ceramic, or cast iron pan to bake in. Then simply pop your pie out of the sturdier pan but still inside the disposable pan once it is done cooling down, ready to give away. If you don’t have the option of putting your disposable pan inside another sturdier pan, definitely put it on a baking sheet—and bake on top of a preheated pizza steel or stone.

Leave a Reply