Ingredients
Method
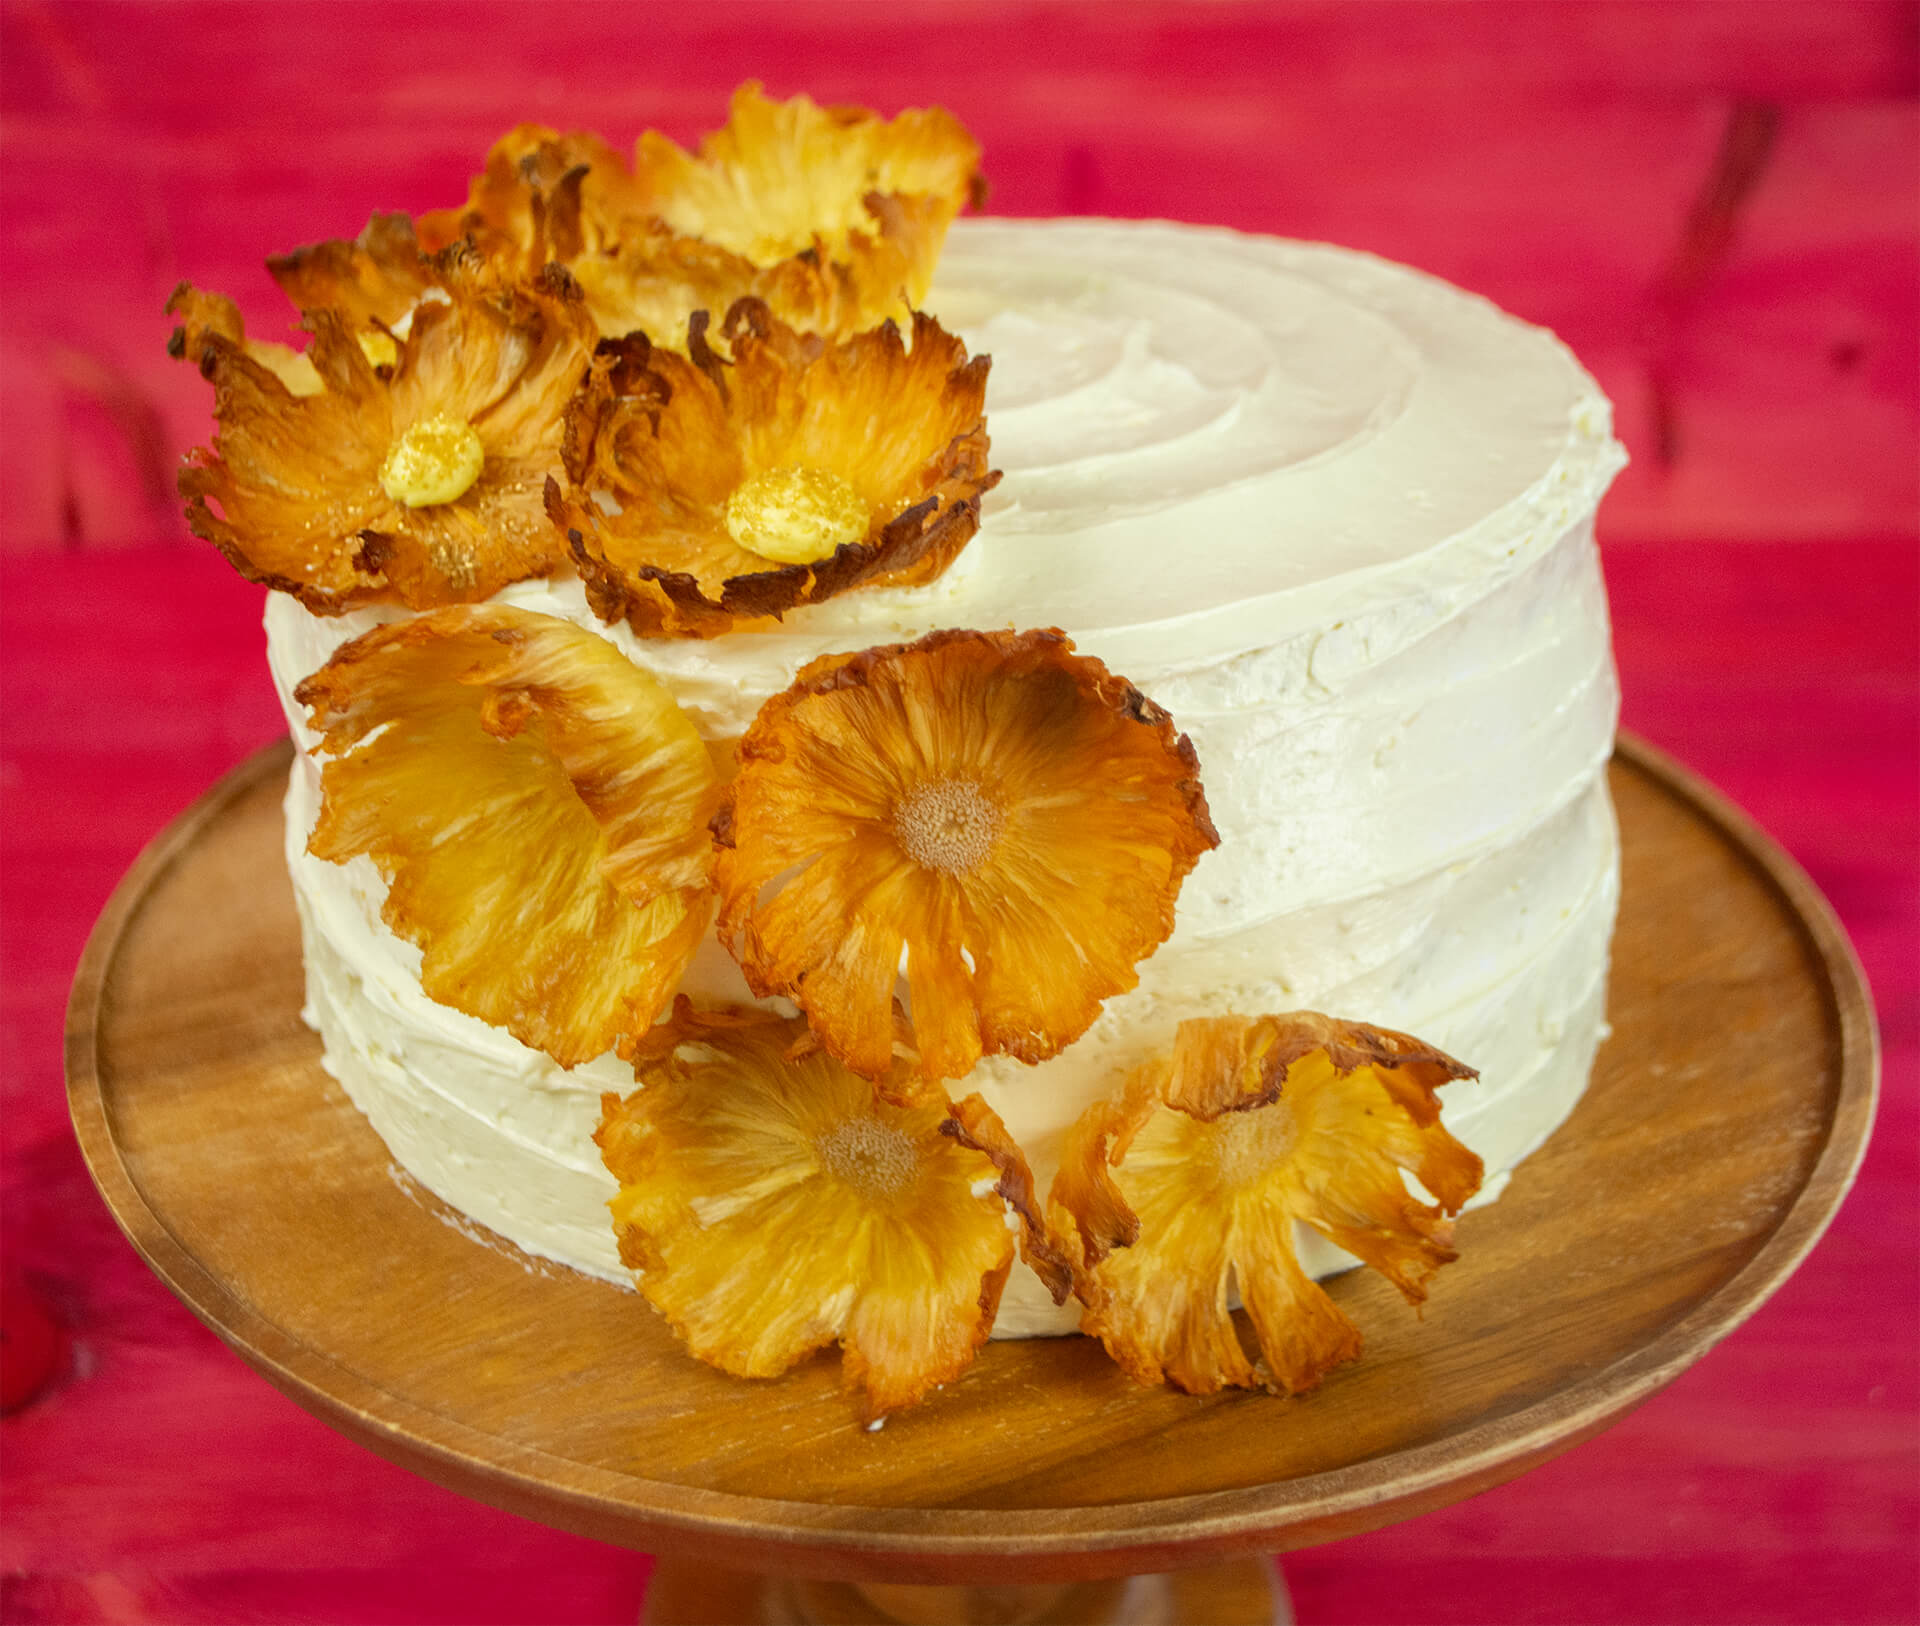
Pineapple Flowers
- Preheat the oven to 200˚F (95˚C).
- Cut the top and bottom off of 1 pineapple. Run a large sharp knife around the outside of the pineapple to carefully remove the peel. Use a veggie peeler to pick out any dots remaining from the peel, then use the knife to cut slices as thin as possible (ideally ⅛" or so).
- Put a layer of paper towel or clean kitchen towels on a baking sheet. Arrange the pineapple slices in a single layer on the towel, and put a second layer of paper or kitchen towels on top. Press down with your hand to blot out the excess moisture.
- Remove the towels, and line the baking sheet with parchment paper or a silicone baking mat. Arrange the pineapple slices on a single layer. Bake for about 2 hours or until they start to thin and dry out.
- Remove the pineapple slices from the baking sheet and press them one by one into the cups of a muffin pan to give them more of a flower shape. Put them back in the oven for another 1–2 hours or until they're a bit darker, thinner (almost lacy), and quite dry. Leave them to cool in the muffin tray to keep their shape.
Caramelized Pineapple Curd
- In a medium heat-proof bowl, whisk together the 100 g granulated sugar and 28 g corn starch until smooth. This helps work out any lumps in the cornstarch without having to pass it through a strainer. Whisk in the 6 large egg yolks until smooth.
- Strain the 2 398 mL (14 oz) cans of pineapple chunks. Set the pineapple chunks aside for later, and put the juice in a small saucepan. Bring it to a boil over medium heat.
- Slowly stream the hot pineapple juice into the egg yolk mixture while whisking constantly, then return the mixture back into the saucepan.
- Heat on medium low while whisking constantly until thick. Remove from the heat and whisk in 57 g unsalted butter, cold until the butter is melted and smooth.
- Pass through a strainer into a clean bowl, and press a piece of plastic wrap directly on the surface to prevent a skin from forming. Chill in the refrigerator until completely cold and set, at least 2 hours.
- Take the pineapple chunks you strained out earlier, and add them to a medium bowl along with 55 g brown sugar. Fold together until the pineapple chunks are coated with brown sugar, and transfer to a small saucepan.
- Heat over medium low heat until the pineapple chunks turn a few shades darker, most of the juice cooks off, and they smell delicious. Set aside to cool to room temperature.
- Once at room temperature, fold the pineapple chunks into the pineapple curd and return to the refrigerator until ready to assemble the cake.
Coconut Rum Mousseline
- In a medium heat-proof bowl, whisk together the 100 g granulated sugar and 35 g corn starch until smooth. This helps work out any lumps in the cornstarch without having to pass it through a strainer. Whisk in the 6 large egg yolks until smooth.
- Add the 1 398 mL can coconut milk to a small saucepan and bring to a simmer. Carefully pour it into the egg yolk mixture while whisking constantly, then return to the saucepan.
- Heat on medium low while whisking constantly until thick. Remove from the heat and whisk in 80 g cold unsalted butter until the butter is melted and smooth.
- Pass through a strainer into a clean bowl, and press a piece of plastic wrap directly on the surface to prevent a skin from forming. Leave to cool at room temperature.
- Put the 225 g unsalted butter in the bowl of a stand mixer fitted with the paddle attachment. Beat on medium high speed until the butter is very light and fluffy.
- Reduce the mixer speed to medium low, and add the coconut pastry cream one dollop at a time. Once it's all added, increase the mixer speed to medium high and keep whipping for another 1–2 minutes until it gets light and fluffy.
- Add ½ cup Malibu rumand 1 tsp. coconut extract if using. These quantities are just suggestions as a good starting point. You can use as much extract and rum (within reason) to get the flavour to where you like it. Add a little at a time, whip, taste, and add more if you like. You can also make this alcohol-free by using just coconut extract.
- Add roughly 3 cups of the mouseline cream to a piping bag fitted with a large round or star-shaped tip. Leave the rest in the bowl for frosting the cake. Leave at room temperature for up to 2 hours until ready to assemble the cake.
Coconut Dacquoise
- Preheat the oven to 350˚F (175˚C). Line a half-sheet (13" x 18") baking pan with parchment paper.
- Sift together the 190 g almond flour, 200 g confectioners sugar, and 95 g pastry flour into a medium bowl. Add the 50 g shredded coconut and whisk together.
- Add the 310 g egg whites, room temperature to the bowl of a stand mixer fitted with the whisk attachment, or add them to a medium bowl and use a hand mixer. Whip on medium speed until frothy. Gradually add the 250 g granulated sugar and whip on high speed until medium peaks form.
- Add about ⅓ of the dry ingredients into the egg whites and gently fold in. Add the rest of the dry ingredients in 2 more additions, folding gently to combine each time. Be careful not to deflate the egg whites too much, though some deflation is normal.
- Pour the batter onto the baking sheet, and use an offset spatula or rubber spatula to spread it out to the edges as evenly as possible. Bake until the cake springs back when touched and is lightly golden, 10–12 minutes. Carefully turn the pan halfway to ensure even baking.
- Leave to cool in the pan for about 10 minutes, then run a knife around the edge of the pan to loosen the cake. Invert it onto a cutting board and peel away the parchment paper. With a sharp knife use a 7-8" round cake board (or a plate that's about 7–8" in diameter) to cut out two full circles and two semicircles of cake as shown in the video at 5:27. Set aside until ready to assemble. If you need to hold off on assembling the cake for more than an hour, store the layers in an airtight container to prevent them from drying out. Save the cake scraps for assembling the cake.
Assemble and Decorate
- Take the cake board (or a large plate) and pipe a small dollop of coconut rum mousseline on either side as shown in the video at 6:00. Press a semicircle of dacquoise over each dollop. Pip a few more dollops of mousseline in the gap in the middle, and fill it in using cake scraps. Enjoy whatever cake scraps are left as a chef's snack.
- Add four standard cookie scoops or about 1 cup of mousseline on top of the cake layer. Spread it out evenly.
- Pipe a ring of dollops of mousseline around the outside edge. Fill the center of the mousseline ring with about half of the caramelized pineapple curd and spread out evenly.P
- Add another 4 cookie scoops or 1 cup of mousseline on top, and spread out evenly.
- Place a layer of coconut dacquoise on top, and press it down to adhere and level it. Repeat the layering process (add mousseline, pipe a ring, filling the center with the rest of the caramelized pineapple curd, and add another layer of coconut rum mousseline).
- Place the final dacquoise layer on top and press it down gently to adhere and level it. Add 4 more cookie scoops (or 1 cup) of mousseline on top, and spread into an even layer. Refrigerate until the cake is firm enough to frost, about 1 hour.
- Take the remaining mousseline, and frost the sides and top as evenly as possible.
- Pipe a small blob of mousseline wherever you'd like a pineapple flower. Press a pineapple flower on each blob.
- If you like, you can pipe another blob of mousseline into the center of each flower and sprinkle with some edible glitter or metallic sprinkles.
Video
Notes
Use only fresh, whole pineapple to make the pineapple flowers (or a pre-peeled whole pineapple). Fresh sliced pineapple rings would also work, but you'll need to slice them even thinner before drying them out to make the flowers. Canned or frozen will not work.
For the pineapple curd, you must use the juice from the can—fresh pineapple juice contains bromelain which prevents the corn starch from thickening the curd. Canned pineapple has been heated to deactivate the bromelain.
I recommend only making the coconut rum mousseline when you're ready to assemble and decorate the cake within the next hour or so, because it can be a pain to bring chilled mousseline back to room temperature and re-whip it to the right consistency. If you have to assemble the cake later though, store the coconut rum mousseline in an airtight container in the fridge for up to 5 days. When ready to use, bring it back to room temperature and place it in your stand mixer bowl, and whip it with the paddle attachment until light and fluffy. Then add 3 cups of the mousseline to a pastry bag fitted with a large round or star-shaped tip and proceed with the recipe.
The cake keeps in the fridge for up to 3 days, and freezes well. Bring to room temperature before serving. Do not re-freeze if you've already frozen and thawed it out—this is a big food safety no-no as it encourages bacterial growth.