This soft bun dough is about to be your new go-to for burger buns, hot dog buns, and even cinnamon rolls! Anywhere you’d use an enriched dough, this recipe shines. It’s super easy to make and handles like a dream because it doesn’t use butter, but is still soft and full of flavour that levels up any burger or sandwich. This is my go-to bun recipe, and it’s about to be yours, too!
Some links in this post may be affiliate links. Read my disclosure policy.

Jump To:
Prefer to Watch Instead of Read?
Why You’ll Love this Soft Bun Dough!
This recipe doesn’t include any butter, which makes it much easier to knead. Butter is a type of shortening, meaning it coats flour and prevents gluten from forming. Because of this, in order to have a good gluten structure in a dough that has lots of butter, you have to develop a decent amount of gluten before adding the butter in piece by piece. I’m as big a fan of brioche as anyone else, but I appreciate having an easy enriched dough like this one in my back pocket. You can literally dump everything into your mixer bowl and just let it knead!
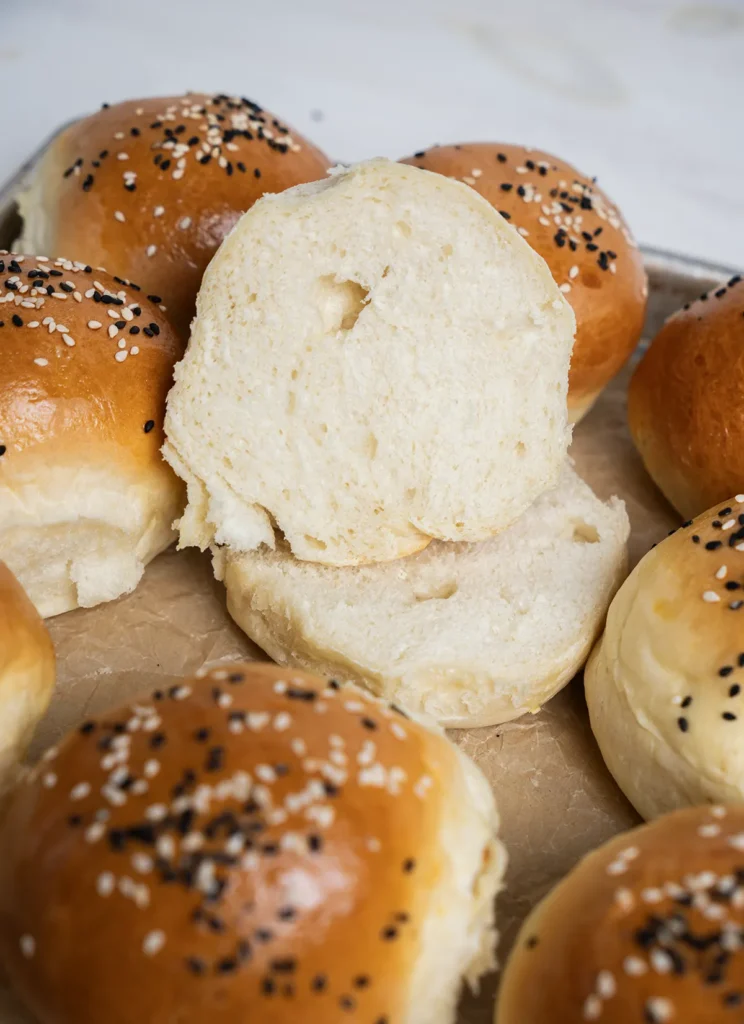
Even without butter, these buns are soft, fluffy, and flavourful thanks to the milk, eggs, sugar, and some salt. The dough is not overly sweet, so it works equally well for savoury recipes like my Mini Gochujang Cheddar Swirl Buns and sweet recipes like my easy Cinnamon Rolls.
This dough is soft and sticky, so I recommend using a stand mixer for kneading. If you prefer kneading by hand that’s totally doable. I demo hand kneading in my video of this recipe.

Ingredients You’ll Need
- All-purpose flour has enough gluten to make this rise tall and fluffy. You can use bread flour instead!
- Milk hydrates the bread while adding some fat and flavour. I recommend using whole milk. You can sub this out for 2% milk or even 10% cream, but I wouldn’t use skim (you might as well use water, honestly).
- Yeast metabolizes starches in the flour and releases carbon dioxide, which gets trapped in the gluten network of the dough causing it to rise.
- Sugar softens the buns and helps them brown nicely in the oven.
- Salt tightens up the gluten and enhances flavour
- An egg adds richness, flavour, and softness to the dough.
- Optional toppings for your buns, like poppy seeds, sesame seeds, coarse salt, or everything bagel seasoning.
Step-By-Step Instructions for Soft Burger Buns
1. Mix and Knead the Dough

If using a mixer: Add all of the ingredients to a stand mixer bowl, attach the hook, and mix on low speed to combine. Increase the mixer speed to medium (but don’t exceed the maximum speed the instructions for your machine recommend for kneading dough) and knead until a soft dough forms that holds together and clears the sides of the bowl, about 8-10 minutes.
If kneading by hand: Add the ingredients to a large mixing bowl and mix together by hand or with a spoon or spatula. Once everything comes together, dump it out onto a clean work surface. Fold the dough over itself and push it out with the heels of your hands, turn, and repeat. You may find it helpful to use a bench scraper like this one to pick the dough up when it gets stuck.
Pro Tip for Hand Kneading
Resist the temptation to add more flour to the counter! This is meant to be a soft and sticky dough at first—that’s what will give the buns their beautiful soft texture. If you add flour to the counter you’ll add it to the dough, which will throw the texture off and make the buns tougher and drier. It will be sticky and difficult to deal with at first. Just keep kneading and eventually the dough will come together and get smooth (and way less sticky!)
2. First Rise
Form the dough roughly into a ball, and place into a lightly greased bowl or container. Cover and leave at room temperature until roughly doubled in size. I like using a 6-quart Cambro container for proofing because it’s large enough for big batches, and it’s clear with measurement markings on the side so you can easily see how high the dough has risen.
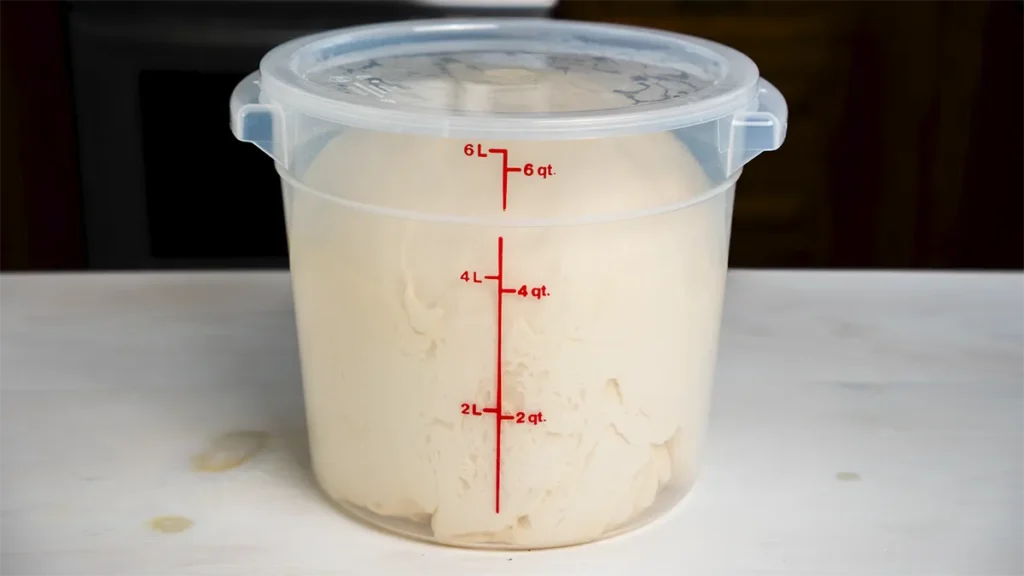
If you’d prefer to proof in a bowl, choose one that’s roughly double the size of your dough before it rises. That way when the dough just about fills the bowl you know it’s done proofing!
3. Divide
Dump the dough out onto a clean counter, and use your bench scraper to divide it into portions depending on what you want to make. Use a digital scale to ensure each portion is close to the same size (within a few grams is fine) so all of the buns bake evenly at the same time. If there’s too much variation in size smaller buns could end up burning while larger ones are still underbaked.

If you have a small bit of dough left over at the end of dividing, you can break that up into a few smaller pieces and add it to other portions of dough—especially any that look a little smaller!
Dough Portion Size Guide
| Type of Bun | Dough Portion Size | Batch Size |
|---|---|---|
| Burger Buns About 3½–4″ (9–10 cm) wide | 85–90 grams | 11–12 buns |
| Hot Dog Buns About 6–6½” (15–16.5 cm) long | 85–90 grams | 11–12 buns |
| Ballpark Hot Dog/Brat Buns About 7–7½” (18–19 cm) long | 95–100 grams | 10–11 buns |
| Slider Buns About 2½–2¾” (6–7 cm) wide | 50–60 grams | 17–20 buns |
| Dinner Rolls About 2¾”–3″ (7–7.5 cm) wide, if shaped as round balls | 60–70 grams | 14–17 buns |
Note: After the first proof, your dough should weigh roughly 1,030 grams.
4. Shape
To make round buns like for hamburgers or sliders, take a portion of dough and start folding it into the center. Once it’s becoming smooth, place it on your counter under your cupped hand. While catching the bottom of the ball with your fingertips, begin rolling the ball on the counter to tighten the top. Pinch the bottom closed.
To make elongated buns for hot dogs, press or roll the dough portion into a rectangle a little shorter than the final length you want (you can just eyeball it). Roll it up tightly into a log, and pinch the bottom closed.
Place the shaped buns on a lined baking sheet and cover with lightly-greased plastic wrap, a damp kitchen towel, or a plastic baking sheet cover. Leave several inches of space between if you don’t want the buns to rise and bake into each other like pull-apart buns. If you don’t mind the buns baking into each other, you can place them closer together.
5. Second Rise
Leave your buns at room temperature until puffy and almost doubled in size, about 45 minutes to an hour. They’re done proofing if you can gently poke a bun and it slowly springs back. If it springs back quickly, give it a little more time. If it doesn’t spring back at all (or deflates), the buns have overproofed—try baking them anyway, but they may collapse in the oven or turn out a little more dense.

Towards the end of proofing, preheat your oven to 350˚F (175˚C). Brush some egg wash on top of each bun, and optionally sprinkle with some sesame seeds, poppy seeds, everything bagel seasoning, coarse salt, or whatever topping you like.
When is The Dough Done Proofing?
Poke a bun gently with your finger:
- If it springs back slowly and leaves a small indent, it’s done!
- If it springs back quickly, give it a little more time. Check back in 15-20 minutes.
- If it doesn’t spring back or even deflates, it has overproofed. You might still be able to salvage the batch. If it’s only slightly overproofed, try baking it as is. If the buns are deflating, try punching down and re-shaping the buns. Proof again for only 20-30 minutes, and bake. The texture might not be as light and fluffy, but they could still turn out OK!
6. Bake
Bake for 20–25 minutes for standard burger or hot dog buns, or 15-20 minutes for smaller buns. They’re done when they are golden brown on top and feel light. An instant-read probe thermometer inserted into the center of a bun should register 190–200˚F (88–93˚C) when fully baked. Transfer to a wire rack to cool completely before slicing.

Storage & Make-Ahead Tips
Buns will last up to about 3 days at room temperature. They’ll likely be fine to eat longer than that, but may start to stale.
Freeze fully-cooled buns in airtight freezer bags for up to 3 months and thaw overnight at room temperature. You can pre-slice the buns to pop slices straight into a toaster or oven and use them without thawing first.
You can also freeze shaped dough, then thaw the dough in the fridge overnight and continue the second rise at room temperature.

FAQs
Yes! You can knead the dough and let either the dough or shaped buns rise overnight in the fridge for deeper flavour. Or make the recipe up to the point of shaping, and freeze the individually-shaped buns for up to 3 months. Thaw them out in the fridge overnight, then complete the second rise at room temperature. You don’t want to thaw the dough out at room temperature, otherwise condensation will form on the surface and potentially affect their texture.
Absolutely! The buns should turn out even loftier thanks to the extra gluten in bread flour.
The dough has a relatively high hydration (meaning, how much liquid there is compared to the amount of flour). That, along with the egg used in the dough, makes for nice soft buns!
Yes! This batch is sized to fit comfortably in a typical home stand mixer (like a Kitchen-Aid), or to be easy to handle if kneading by hand. If you have a larger mixer like an Ooni Halo Pro (which can easily handle a triple batch) or don’t mind hand kneading a large batch of dough, you can absolutely double or triple this recipe.

Soft Burger Buns
Ingredients
Method
- Mix & Knead: Add 325 g whole milk, 2 teaspoons instant or active dry yeast, 1 large egg, 30 g granulated sugar, 600 g all-purpose flour, and 2 teaspoons fine sea salt (in that order) to a large mixing bowl or the bowl of a stand mixer. Mix until the ingredients are combined, then knead until the dough is smooth, less sticky, and holds together. If using a stand mixer, the sides of the bowl should be clean and the dough should be pulling away from the sides of the bowl.
- First Rise: Roughly form into a ball and place into a lightly greased bowl that's at least double the size of the dough. Cover and leave at room temperature until doubled in size (about 1–1.5 hours).
- Divide & Shape: Dump the dough out onto a clean counter. Using a bench scraper and a scale, divide the dough into even portions. See the table in the blog post above for suggested portion sizes depending on what kind of buns you want to make! Form the portions into smooth balls for burger or slider buns, or into smooth logs for hot dog buns. See the post above or watch the linked video to see how it's done. Arrange the buns on lined baking sheets. Leave several inches of space between the buns if you don't want them rising or baking into each other like pull-apart buns.
- Second Rise: Cover with a damp kitchen towel or plastic baking sheet cover, and leave at room temperature until almost doubled in size, about 45 minutes to an hour. Towards the end of the second rise, start preheating the oven to 350˚F (175˚C). Brush the tops of the buns with egg wash, and optionally sprinkle on some sesame seeds, poppy seeds, coarse salt, or everything bagel seasoning.
- Bake: Bake for 20–25 minutes for burger buns, or 18-20 minutes for hot dog buns. When they're done baking, the buns will be golden brown and feel light. If you have a probe thermometer, you can use it to measure the internal temperature to make absolutely sure the buns are fully baked. You're looking for the middle of a bun to be 190–200˚F (88–93˚C).
- Cool: Transfer the buns to a wire rack to cool completely before slicing.
Leave a Reply