What happens when you add sourdough to Canada’s most iconic deep-fried dough? You get extra delicious Beaver Tails with crispy edges, tender centres, and a whole lot of flavour, that’s what! Honestly, I dare say these are even better than the ones you get from the Beaver Tails food truck?
Some links in this post may be affiliate links. Read my disclosure policy.

Jump To:
- Why You’ll Love These Mini Sourdough Beaver Tails
- What Are Beaver Tails?
- Ingredients for Making Mini Sourdough Beaver Tails
- Making Mini Sourdough Beaver Tails Step-by-Step
- Baking & Bulk Fermentation Schedule
- Topping Ideas for Your Mini Sourdough Beaver Tails
- Making Ahead, Storage & Reheating
- FAQs
- Did you Try These Mini Sourdough Beaver Tails?
- Mini Sourdough Beaver Tails (Better Than Food Truck!)
Why You’ll Love These Mini Sourdough Beaver Tails
- Egg- and dairy-free just like the originals.
- The mini size makes shaping and frying much easier.
- Naturally leavened with sourdough for extra flavour and crispiness.
- Totally customizable with any topping you like!
- Make-ahead friendly with an optional overnight cold proof to fit your schedule (bonus: that also deepens flavour!)
What Are Beaver Tails?
Beaver Tails first appeared in the late 1970s at a small fair in Killaloe, Ontario, west of Ottawa. They were inspired by a German family recipe for flat fried dough. Noticing the shape resembled a beaver’s tail, the founder Grant Hooker named it as such! The sugary fried dough treat quickly became a favourite anywhere Canadians gathered, craving something warm, sweet, and comforting.
This recipe adds sourdough for tenderness and added flavour. I like making them in mini, so they’re way easier to shape, handle, and fit in a deep fryer or pot. I also like the smaller serving size—these are pretty rich and filling! And like the real thing, this recipe uses no milk or eggs.
Want tRegular-Sized Beaver Tails?
Divide the dough into 6 pieces instead of 8. Just double-check that they’ll fit in your deep fryer or pot!
Ingredients for Making Mini Sourdough Beaver Tails
- All-purpose flour has enough gluten to provide structure, while keeping the crumb tender.
- Sourdough starter leavens the dough and adds a tangy flavour. If you’re new, check out my post on how to make sourdough starter.
- Sugar helps with browning, and keeps the crumb soft.
- Salt enhances flavour and tightens the gluten structure.
- Oil (in the dough) softens it and makes stretching easier. Use a neutral oil like grapeseed.
- Oil for frying. Choose a neutral oil with a high smoke point, like peanut or canola.
Making Mini Sourdough Beaver Tails Step-by-Step

- Add all of the dough ingredients together to a mixing bowl. Mix until combined and no dry bits of flour remain. Knead by hand or machine until smooth and the dough holds together.
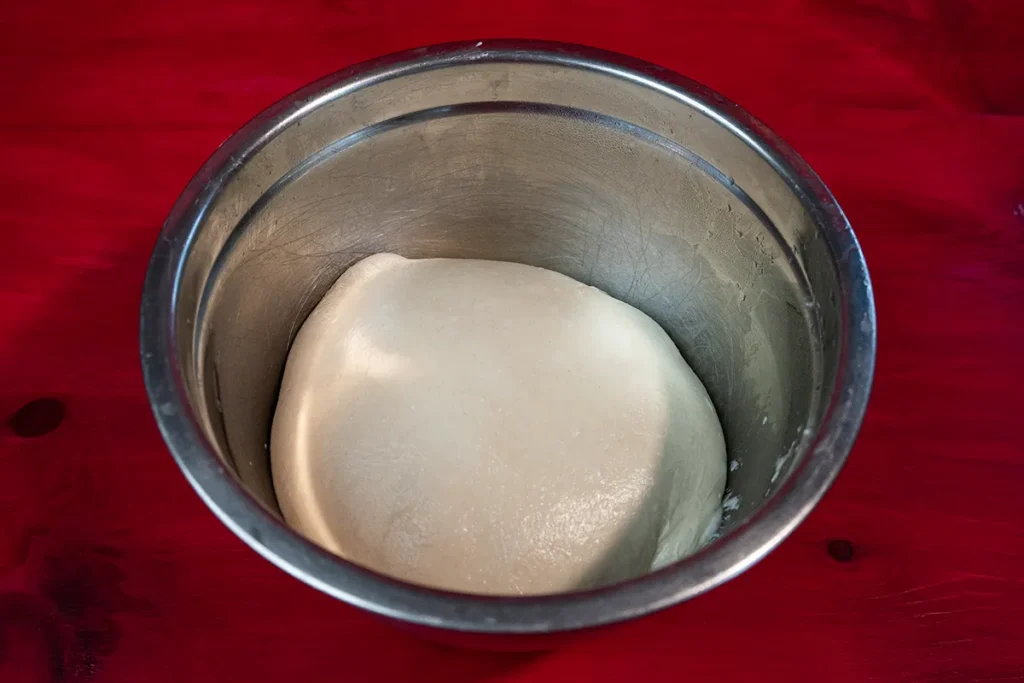
- Form into a smooth(ish) ball and place in a lightly-oiled bowl and cover. Perform 3-4 sets of stretch-and-folds each about 30 minutes apart. Leave at warm room temp until risen about 60-80%.

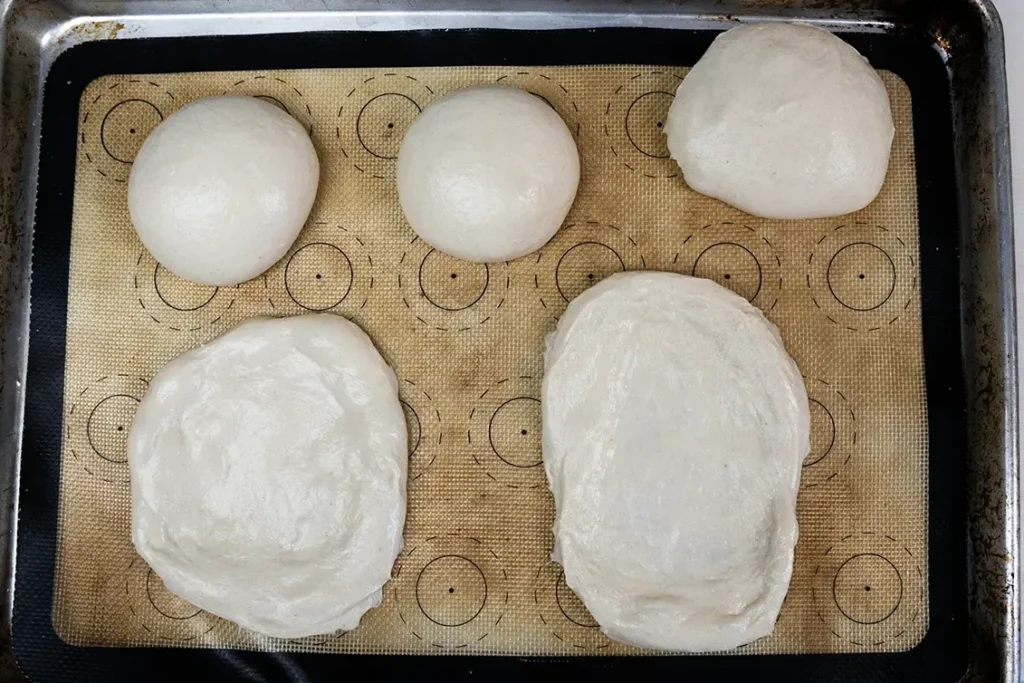
- Place the ball of dough on a clean lightly-floured work surface. Gently flatten it into a circle, and divide roughly into 8 pieces (for minis) or 6 (for regular-sized).

- Form each piece into a smooth ball, as if you’re making buns. Cover and rest for 10-15 minutes.
- Using your fingertips or a rolling pin, gently flatten the balls to about ¼” (0.6 cm) thick. Pull on the ends to form into ovals. Cover and proof until slightly puffy. After about an hour, heat at least 2″ (5 cm) of oil in a deep fryer or large heavy-bottomed pot to 375˚F (190˚C).
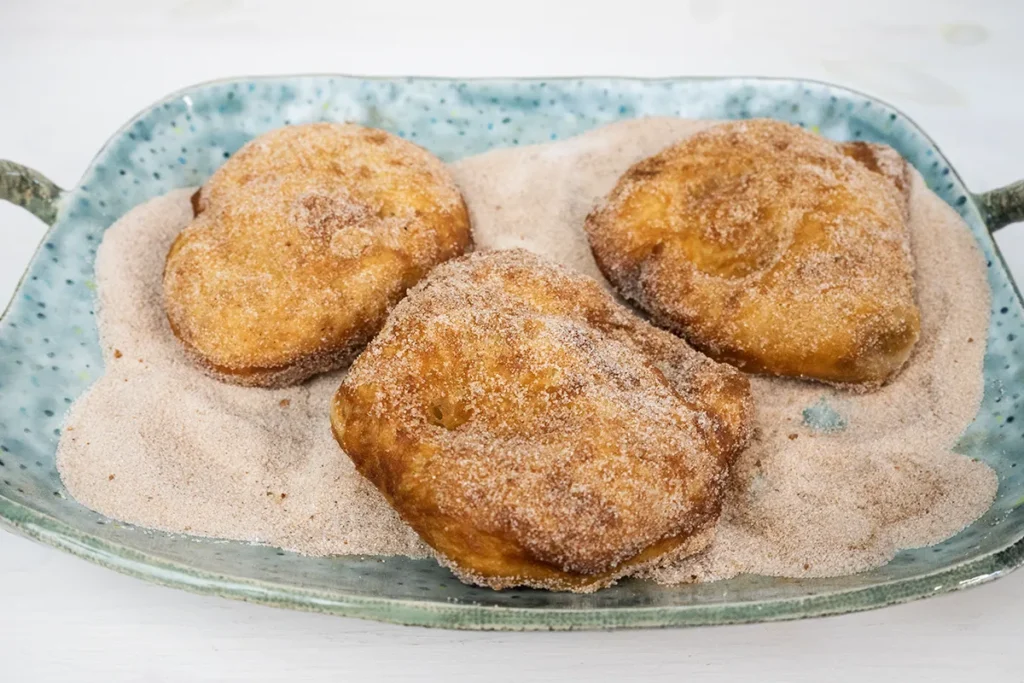
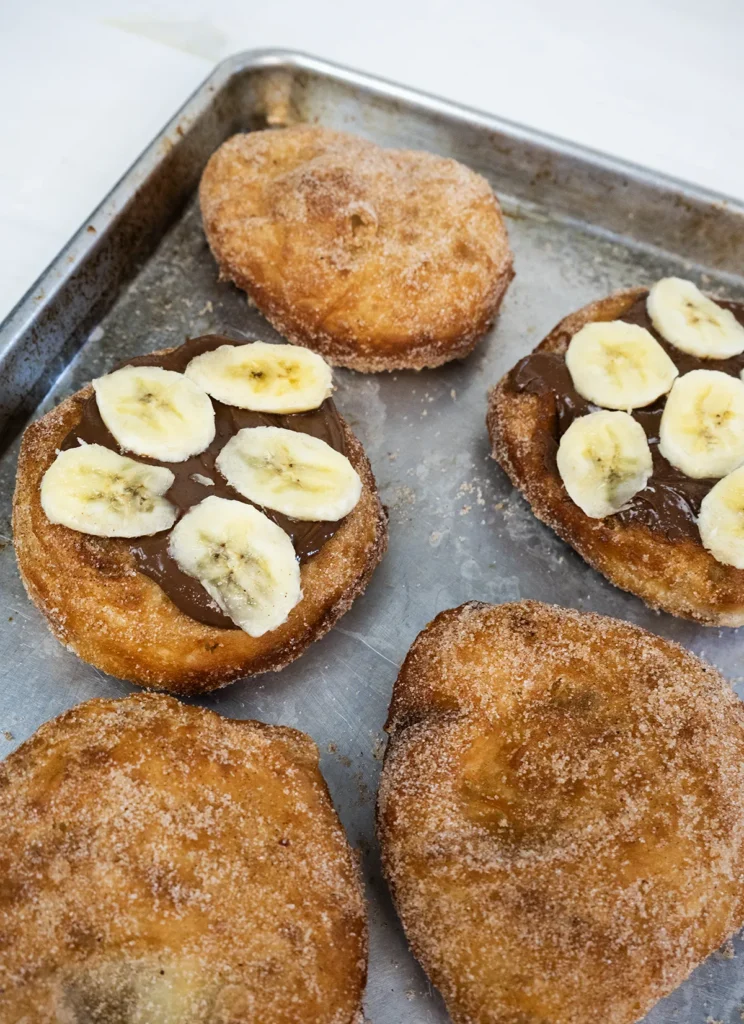
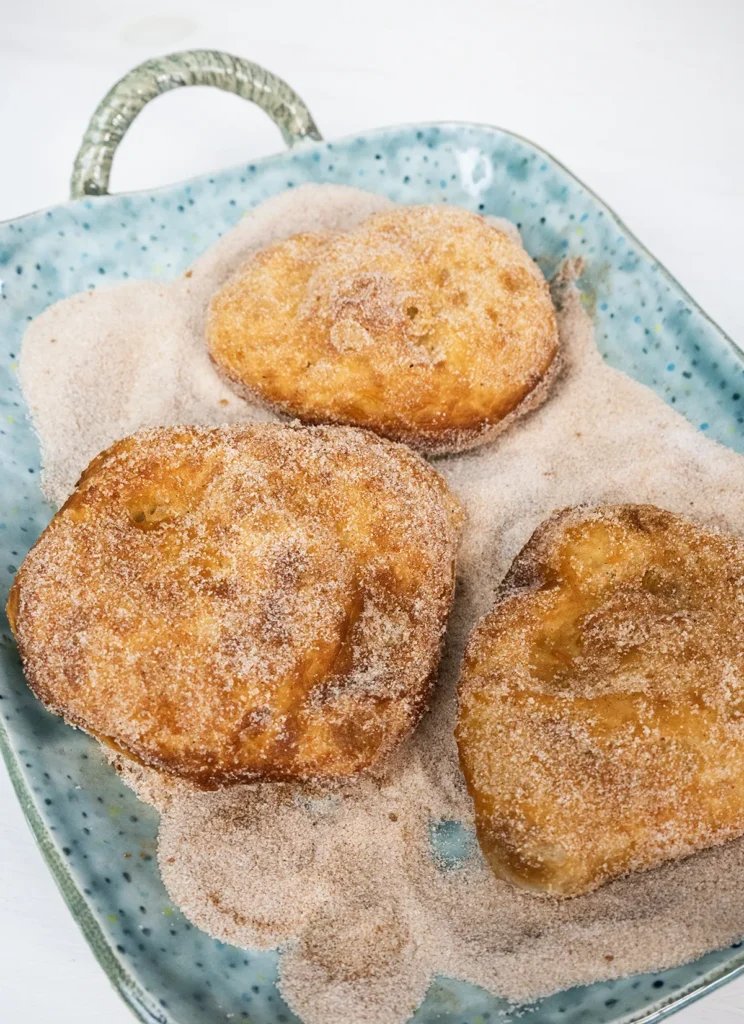
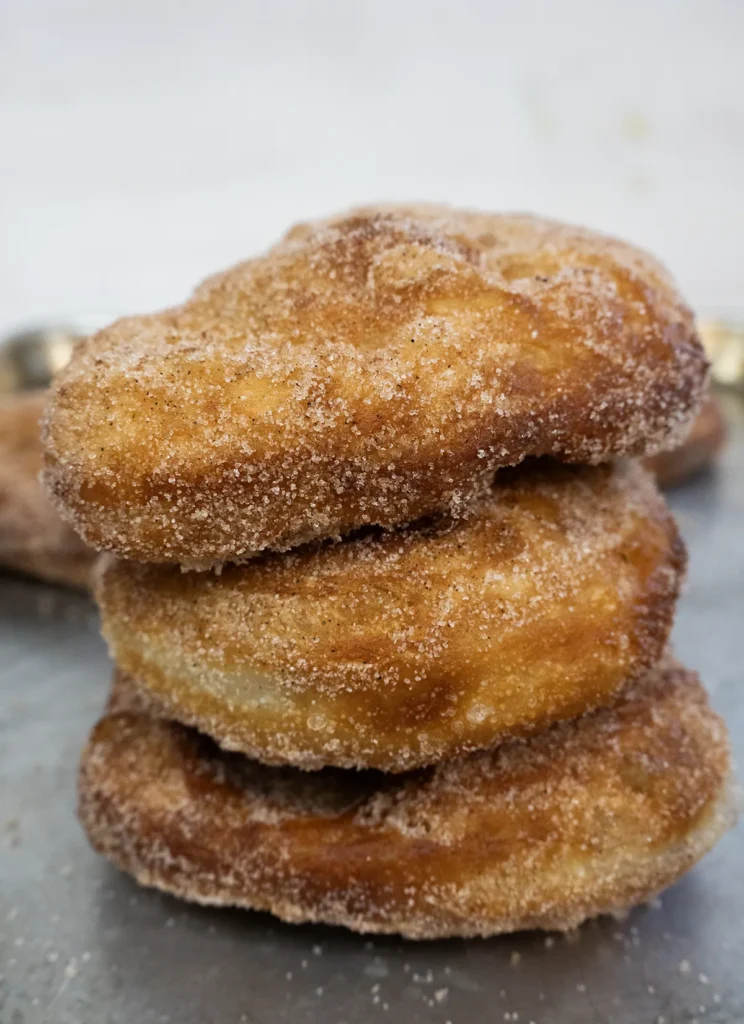
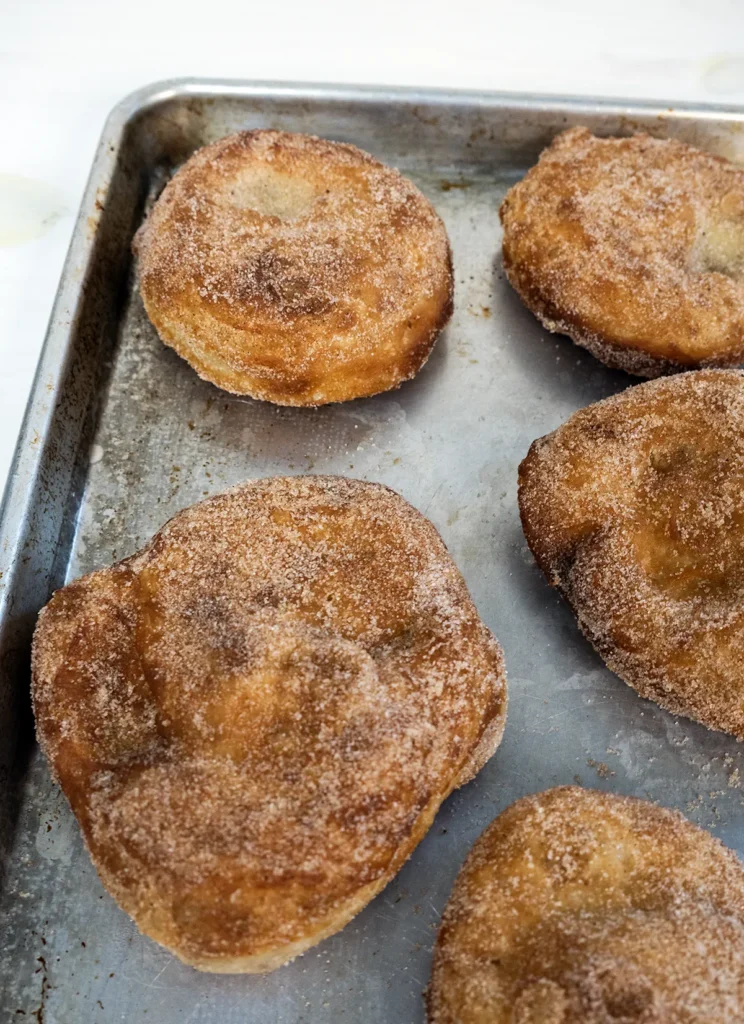
- Line a baking sheet with a couple layers of paper towels. Fry 1-2 Beaver Tails at a time, for about 3 minutes per side or until golden brown. Carefully remove from the oil and let the excess oil drip off, and drain the Beaver Tails on the paper towel. Coat in cinnamon sugar while still warm, and add other toppings if you like!

Baking & Bulk Fermentation Schedule
This schedule assumes your room temperature is about 21˚C (70˚F) and your dough temperature after mixing is about 22˚C (71˚C). Cooler or warmer temps affect bulk fermentation, so watch the dough instead of the clock.
Next-Day Fry (Overnight Cold Proof)
6:00 PM
Mix the ingredients, and knead until smooth. Cover and rest.
6:30 PM
Begin bulk fermentation. Perform 3 or 4 sets of stretch-and-folds about 30 minutes apart.
10:00 PM
The dough should have risen about 60-80%. Cover it tightly, and transfer to the fridge to cold ferment.
Next Day 9:00 AM (or 1–1.5 hours before frying)
Take the dough out of the fridge. Divide into 8 pieces (mini) or 6 pieces (regular). Shape into smooth balls, cover, and rest for 10-15 minutes. Flatten the balls to about ¼” (0.6 cm) and pull gently into an oval. Cover and proof until slightly puffy.
10:00 AM
Preheat oil to 375˚F (190˚C). Fry 1–2 at a time until golden, about 3 minutes per side. Drain on paper towels and toss in cinnamon sugar or any toppings you like (see below for some ideas!).
Same-Day Fry (No Cold Fermentation)
8:00 AM
Mix and knead the dough until smooth.
8:30 AM
Begin bulk fermentation, with 3 or 4 sets of stretch-and-folds spaced about 30 minutes apart.
12:30 PM
The dough should rise by about 60-80%. Divide, shape, flatten, and proof (same as above).
2:00 PM
Preheat oil to 375˚F (190˚C). Fry and finish as above.
Just Eyeball it When Dividing
Since these are fried individually, making them all the same exact weight isn’t critical. For minis, divide the dough roughly into 8 pieces, and for regular-size divide into 6.
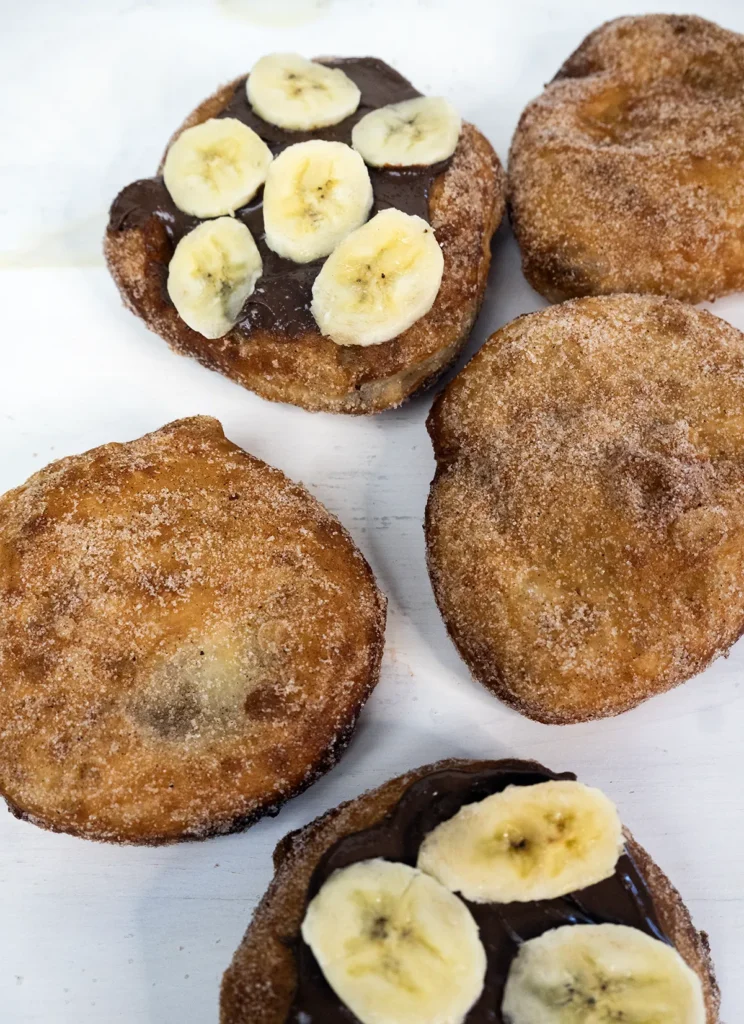
Topping Ideas for Your Mini Sourdough Beaver Tails
You can customize your Beaver Tails any way you like. Think of them like sweet deep-fried pizzas. Here are a few ideas:
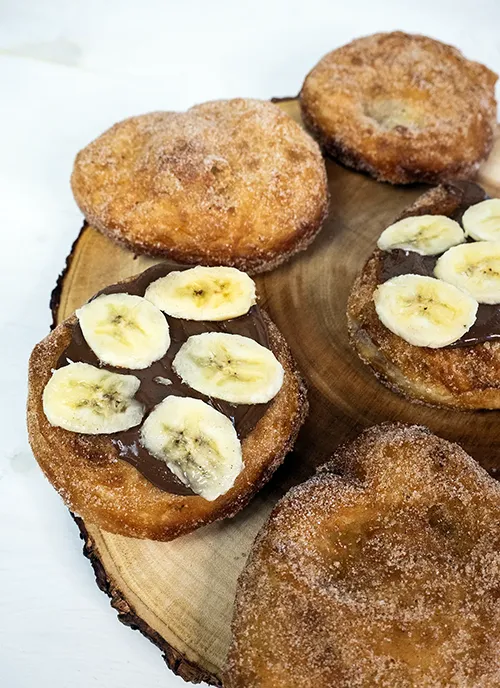
- Banana Nutella: Spread on some Nutella and arrange banana slices on top.
- S’mores: Spread on some marshmallow fluff and toast with a kitchen torch. Sprinkle on some crushed graham crackers and drizzle on melted milk chocolate or ganache.
- Churro: Toss the warm Beaver Tail in cinnamon sugar, then drizzle on some caramel sauce or dulce de leche.
- PB&J: Spread on some peanut butter and raspberry jam.
- Lemon Meringue: Spread some lemon curd. Top that with marshmallow fluff or a Swiss or Italian meringue, and toast it with a kitchen torch.
- Maple Pecan: Drizzle some maple syrup, and sprinkle some chopped candied pecans.
- Berry Shortcake: Pile on some whipped cream and fresh berries.
- Salted Caramel Pretzel: Drizzle caramel sauce and sprinkle some chopped pretzels. Add a little flaky salt if you want it even saltier!
- Coconut Cream Pie: Spread some pastry cream made with coconut milk, and sprinkle some toasted sweetened coconut flakes on top.

Making Ahead, Storage & Reheating
Beaver Tails are best enjoyed the day they’re fried, but will keep at room temperature in an airtight container for up to 2 days.
To make ahead, make the recipe up until forming the dough into balls. Arrange on a baking sheet lined with a silicone baking mat or parchment paper, cover, and freeze until solid. Store in an airtight container for up to 3 months. Defrost in the fridge overnight, then flatten and proof at room temperature as usual.
FAQs
Yes! Just be aware that bulk fermentation may take a little longer, and your Beaver Tails may have a more noticeable sour flavour. Avoid using discard that’s older than 2 weeks—otherwise you could get overly-strong sour or acetone flavours.
Doughy usually means they were under-cooked, too thick, or the oil wasn’t hot enough. Greasy usually points to oil that wasn’t hot enough. Both issues can be caused by under-proofed Beaver Tails, so make sure to hold off on frying until they’re noticeably puffy and airy looking.
Yes! Bake at 450˚F (230˚C) for 7-8 minutes for minis or 9-10 minutes for regular-sized Beaver Tails, or until they’re puffy and golden. Right after they come out of the oven, brush with melted butter and toss in cinnamon sugar or top however you like.
Use an oil with a neutral flavour and high smoke point (i.e. the temperature at which it starts smoking). Good choices for deep frying oil are canola, peanut, refined sunflower, or grapeseed oil.
Did you Try These Mini Sourdough Beaver Tails?
I’d love to hear how they turned out! Please drop a comment below to let me know what toppings you went with, or if you made any tweaks. And if you liked the recipe, leaving a quick star rating helps other bakers find the recipe, too. Thanks a bunch for baking with me!
Mini Sourdough Beaver Tails (Better Than Food Truck!)
Ingredients
Method
- Mix & Knead. To the bowl of a stand mixer or large mixing bowl (if mixing by hand) add 350 g all-purpose flour, 210 g water, 70 g active sourdough starter, 35 g granulated sugar, 25 5 neutral oil, and 2 teaspoons fine sea salt. Mix to combine, then knead for 8-10 minutes until smooth.
- Bulk ferment. Transfer to a lightly-oiled bowl or container and cover. Leave at room temperature in a warm place, and perform 3 or 4 sets of stretch-and-folds about 30 minutes apart. Leave for 4-4 ½ hours or so, or until it has risen by about 60-80%. See the post above for some sample baking schedules, whether you want to cold ferment overnight or fry the same day.
- Divide & Shape. Divide the dough into 8 pieces for mini Beaver Tails, or 6 for regular-sized ones (just eyeball it). Shape each piece into a smooth ball as if you're making buns, then cover and rest for 10-15 minutes. Flatten each ball using your fingertips or a rolling pin until it's about ¼" (0.6 cm) thick, and pull on an end to elongate it into an oval. Cover and proof at room temp until it's a bit fluffy.
- About an hour into proofing your shaped Beaver Tails, start preheating the oil in a large heavy-bottomed pan (like a Dutch oven) or a deep fryer to 375˚F (190˚C). Line a baking sheet with a couple layers of paper towel to drain the Beaver Tails on after frying.
- While the oil preheats, make the cinnamon sugar. In a small bowl, whisk together 50 g granulated sugar, 1 teaspoon ground cinnamon, and optionally add ⅛ teaspoon nutmeg and ⅛ teaspoon cardamom. Transfer to a wide shallow bowl or small baking sheet to make it easy to coat the Beaver Tails.
- Fry one or two Beaver Tails at a time (or however many will comfortably fit in your deep fryer or pot without crowding). Fry for about 3 minutes per side, or until golden brown, then carefully flip using a pair of forks. Carefully remove from the hot oil using a spider or pair or forks and let the excess oil drip off. Drain on the paper towels. Coat in cinnamon sugar on both sides while they're still warm.
- Eat plain with just cinnamon sugar, or top with any toppings you like! See the post above for some ideas. Beaver Tails are best enjoyed the day they're made, but plain cinnamon sugar Beaver Tails can be stored in an airtight container at room temperature for a couple of days. You can refresh a day old Beaver Tail by microwaving for 15-30 seconds or heating in a 300˚F (150˚C) oven for 3-5 minutes or just until heated through and a little crispy.
Leave a Reply